
Dyeing Easter Eggs – Naturally
How to dye Easter Eggs the natural way
It’s Easter (already!) Every year, I see Easter Eggs dyed in garish colours for sale at the shops. I shudder to think – what is in these dyes? This year, I decided to dye some eggs with natural colours, just for the fun of it.
This is a lovely project to do with kids, but if you want to produce several different colours it is quite a bit of work – not hard work, but time-consuming.
What you need
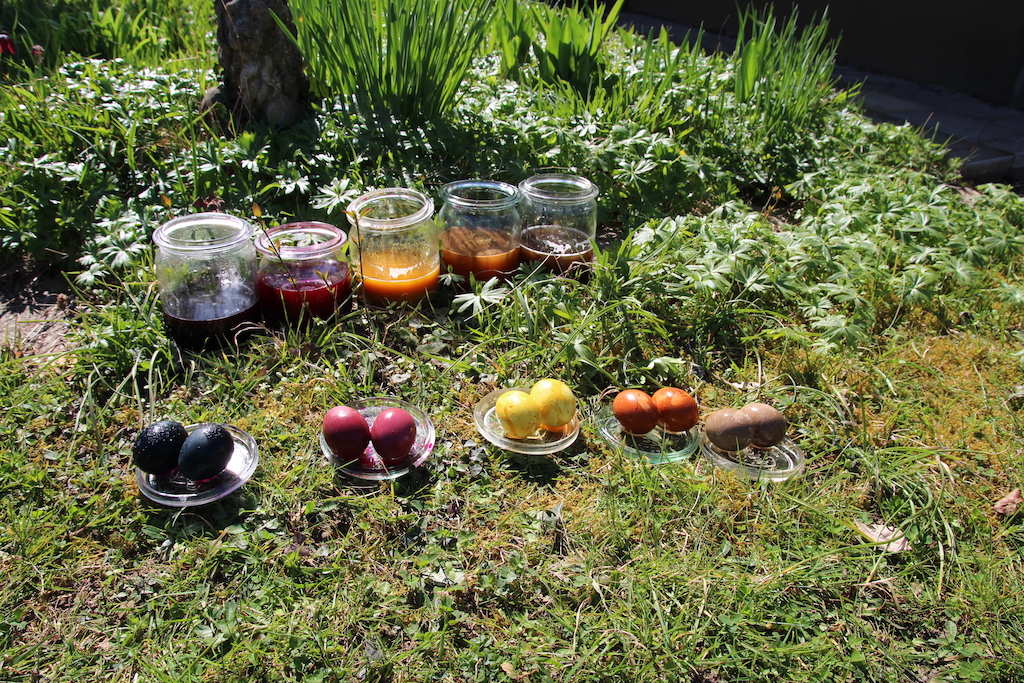
All you need are some eggs and some raw materials to make your dye baths. Use an old pot as some of the materials may stain permanently. Hard boil your eggs in advance. White eggs take on the colour better than brown ones.
- White eggs, hard-boiled
- Vinegar
- An old pot
- Dye materials:
Yellow – 20g of dry Turmeric powder, or Yellow Onion Skins
Orange – 1 cup of grated carrots
Red – 1 cup of grated fresh beetroots
Green – Fresh Nettles, or Spinach leaves. Chop finely and use at least 2 cups.
Blue – 1 cup of grated red cabbage
Method:
Making the Dye Baths
The procedure is always the same. Take about 1 cup of dye material and 3 cups of water. Simmer for about 15-20minutes, then turn off the heat strain and cool. Add a couple of tablespoons of vinegar, then place your hard-boiled eggs into the dye bath and keep them submerged for about 24 hours.
After 24 hours remove the eggs. You can wash them if you want a cleaner, pastel colour or dry the eggs completely. For a final touch, polish them with a dab of oil to bring out the colour.
Note: Don’t leave the eggs in the dye bath for too long. I tried leaving them in there for two days, thinking that it might make the colour stronger. Maybe it did, a bit. But the eggshells turned soft.