Rosemary – Rosmarinus officinalis

Rosemary – Rosmarinus officinalis

Most of us know this woody, aromatic bush as a culinary herb, but in fact, Rosemary is so much more than that. It has some quite remarkable properties that are well worth remembering.

As a kitchen herb, Rosemary is an old stand-by: Rosemary potatoes, Rosemary chicken, Rosemary salt, Rosemary lamb, or Rosemary fish are all familiar menu items.  The needle-like leaves have a highly aromatic, somewhat medicinal scent. The flavour is distinctive, somewhat bitter, and resinous, which perfectly complements fatty foods. It ‘cuts through’ the grease. This is why it is used to flavor greasy meat and fish dishes and to aid digestion. Rosemary acts as a token apology to the liver.

Rosemary, which has long been known as Rosmarinus officinalis, was recently assigned to the Genus 'Salvia'. That means, it is botanically grouped with the sages. However, the old name is still acceptable, but keep the name change in mind to avoid confusion.

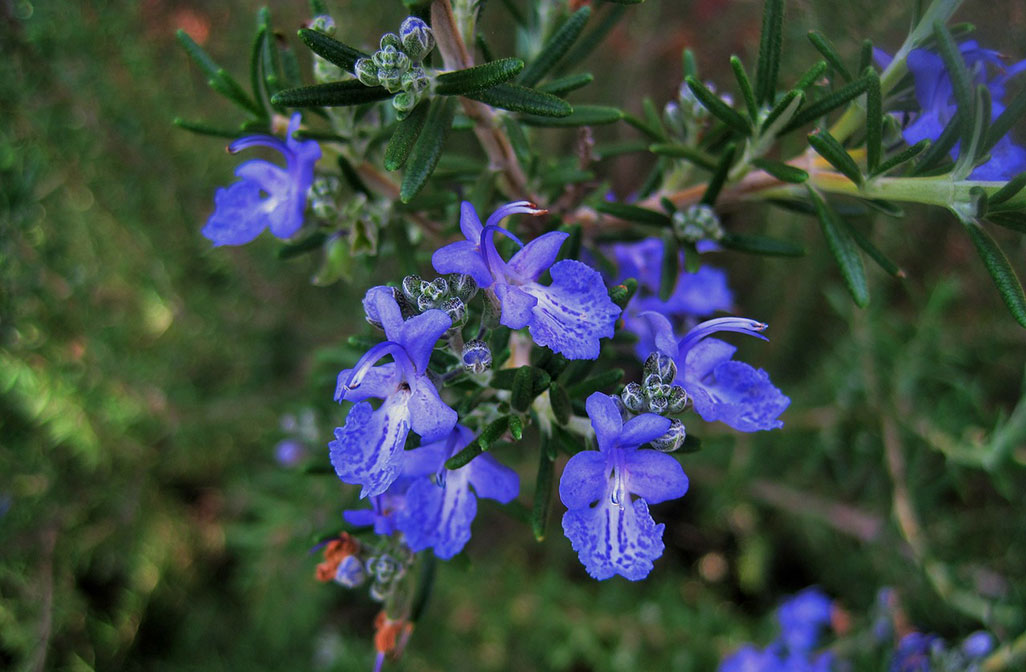
Although it is an herb of the mint family (Lamiaceae), its thin, spiky leaves lend it the appearance of some kind of dwarf conifer. Rosemary is at home in the semi-arid climate zone of the Mediterranean coastal region. It commonly grows in the garrigue, the shrubland that covers the lower hills. Its scientific name - 'rosmarinus' means 'Dew of the Sea'. It indicates that this herb likes to be 'kissed' by the salty mist coming in from the sea. Others have suggested that the name perhaps alludes to the light blue flowers. A bush that is profusely covered in flowers has the appearance of sea foam on the crest of a wave. Thus, Rosemary has also been linked to the Greek Goddess Aphrodite, who was born from the foam of the sea.

In the Mediterranean, it is one of the earliest flowers to appear in the New Year. Its pale blue flowers blush the wild coastal hillsides, spreading an aromatic scent that awakens the sleepy bees. Rich in nectar, Rosemary is one of their first sources of nourishment. The highly aromatic Rosemary honey is sold at local markets as a highly prized regional specialty.

Rosemary's intense fragrance and aromatic flavor are due to essential oils, which are obtained not from the flowers, but from the needle-like leaves. As a key ingredient of the ever-useful herb blend known as  ‘Herbes de Provençe' it is a quintessential item on the herb shelf.
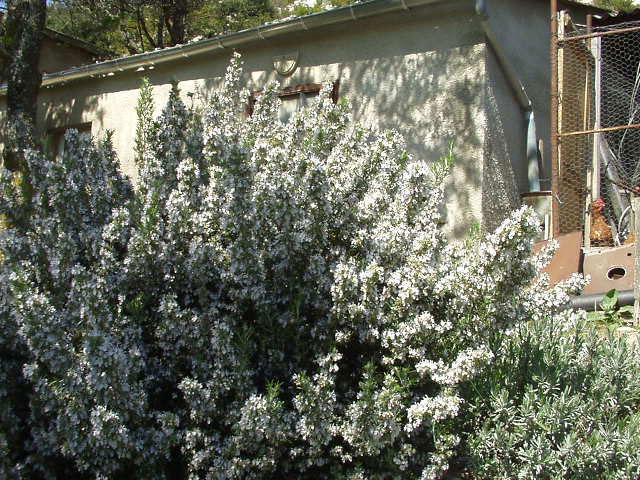
Rosemary bush

Medicinal uses of Rosemary

This essential oil is also responsible for its medicinal properties. Rosemary oil stimulates blood circulation, particularly to the head. It has a beneficial effect on memory. In herbal lore, this property is associated with the remembrance of loved ones, and friends, and those who have recently passed away.

Rosemary’s bitter principle aids digestion. It 'warms' the stomach and stimulates the liver and gallbladder. It helps the body to break down fats and improve digestion.

It also shows anti-viral, anti-bacterial and anti-fungal properties. Externally, a Rosemary infusion can be used to cleanse badly healing wounds.

Cooking with Rosemary

Rosemary goes great with roasts - whether you are roasting a goose, lamb chops, or a pan full of root vegetables, a sprig of rosemary transforms the dish and adds a complex, slightly bitter and highly aromatic flavor.

Purification

Rosemary has also long been used as incense, particularly in combination with Juniper berries. This tradition has continued into modern times. It is still sometimes used to fumigate and purify the air in a patient's room. It is also popular as a cleansing aromatic that is used in sauna infusions, or to scent bath oils and soaps.

Restorative

Rosemary’ is a tonic and restorative. Its stimulating action on the blood circulation and coronary function and can restore vitality and strength to convalescents or feeble children. In the past it was also used as an aphrodisiac that had the reputation to restore a dwindling manhood. Recent research has shown that Rosemary contains

Cosmetics

Rosemary can be added to home-made shampoos or hair rinses. It will stimulate the follicles and promote hair growth. In the ‘still room,’ its essence would have been added to skin tonics, lotions, and oils.

Rosemary Hair Rinse

The simplest way to let your hair benefit from the tonic power of Rosemary is to simply make a strong infusion of 1 tablespoon of dried rosemary leaves to 500 ml of water - infuse with boiling water and steep until it has cooled down, strain and massage into the scalp. Leave it for a few minutes, then rinse it out. It is best when prepared fresh, but it will keep for a few days in the fridge.

Rosemary Shampoo

Unscented shampoo bases are readily available at many stores these days. Get one you like and add a few drops of Rosemary Essential Oil to it.

Recommended for brown or dark hair as it will naturally darken the hair over time.
Foraging Chickweed

Foraging Chickweed

Chickweed (Stellaria media)

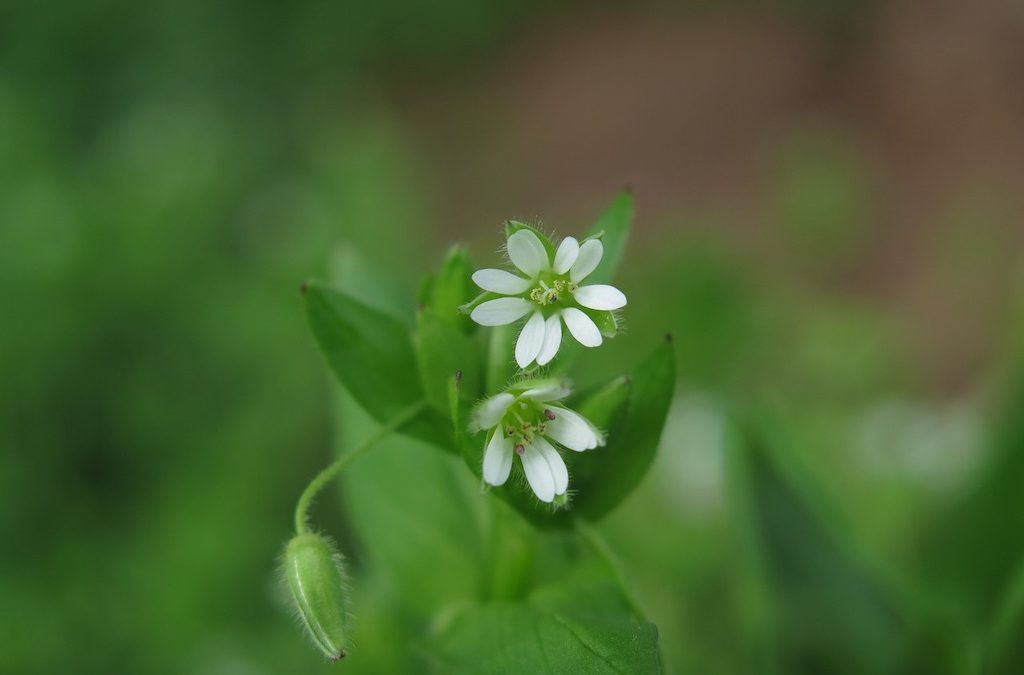
Once winter has settled in, foraging has come to a standstill. We have to rely on previously gathered supplies. Except, if you are lucky enough to live in a temperate climate zone, there may be at least one herb that defies the elements. You might have spotted it in your veggie plot: a little sprawling herb with heart-shaped leaves and star-shaped flowers that belongs to the Pink family known as Chickweed.

Chickweed is fairly hardy. It defies the elements and can pop up early in the year when other herbs are still asleep. 


Chickweed is one of those herbs that gardeners love to hate. They try everything to get rid of this persistent 'weed' that pops up anywhere humans have toiled to cultivate the ground. It is only natural. 


Chickweed is one of those herbs that blush at bare soil and quickly spread out to cover mother earth's nakedness. Chickweed binds the soil, prevents it from washing away and drying out - the consequences of standard gardening practices. 


Alas, as soon as this little healer herb appears, gardeners grit their teeth and start a crusade. How dare this audacious herb invade their plot?


But instead of battling it, you could welcome it as a gift. Chickweed is a blessing, not just for the earth but also for us. It is rich in chlorophyll, minerals, and vitamins that are sorely needed at this time of the year. And all we have to do is clip its tender tops. 


Chickweed has a mild flavour and is incredibly versatile. It can be used like alfalfa to garnish sandwiches, soups, and salads. It can also be incorporated into omelets, fillings, sauces, dumplings, or quiches - the possibilities are endless. But it should always be used fresh and finely minced, as the stems can be somewhat stringy. When cooking with Chickweed, bear in mind that it cooks down to practically nothing in no time at all, so just add it at the last moment and don't cook it for long. Overcooking would only diminish its benefits.


Chickweed also offers some valuable medicinal properties. The old herbalists describe its effect as cooling and soothing. They used it as an expectorant for afflictions of the upper respiratory tract, like an irritable cough. The same cooling and soothing properties also calm inflamed sores, rashes, itchy skin conditions, and burns. Traditional herbalists used it to make ointments and poultices for treating eczemas, boils, and abscesses.


Sometimes it is made into a tincture, but fresh works best. If you want to concentrate its effect, it can be juiced. But it does not keep very long. It can be frozen, but that will diminish some of its goodness. 


Warning: some people have reported allergic reactions to Chickweed collected from chalky soil. Like many other members of the Pink family, Chickweed contains saponins, and these can be toxic in large quantities.

Preserving the Harvest (1)

Preserving the Harvest (1)

This article is about ways to preserve the harvest. Making your own pickles and preserves, jams and chutneys, liqueurs and canned veggies is a great way to celebrate the abundant gifts of nature. If you can get the kids involved, it is also a wonderful opportunity to bond and share stories while teaching them essential life skills.

Not too long ago, gardening and making one's own food was considered old-fashioned and tedious work. It was something that belonged to the domain of Grandmothers and country bumpkins. Why bother, if all you need to do is to go down to the supermarket?

But things have changed. Soaring food prices, GM technology and a growing concern over dubious agrochemicals that have crept into our food supplies, more people have turned to gardening and making your own is fashionable again.

While the garden may not cover all your food needs, even producing some of your own food is uniquely satisfying. However, there is one problem: living in a temperate climate, with a limited growing phase, we are subject to the 'feast or famine’ phenomenon. The harvest is plentiful during the warm part of the year, but there is almost nothing to harvest during the winter.

With any luck, the harvest is plentiful enough to provide for the cold season as well - but how can we preserve the abundance, so when winter comes we can still enjoy the fruits of the previous season's labor. What delight it will be then to have tasty reminders of the summer's plenty.

Freezing

These days, freezing is usually considered the easiest and quickest method to preserve anything. It certainly is convenient - if you have a very large freezer, that is. However, it is not a very energy efficient method, and nor is it particularly reliable. Power cuts occur with worrying frequency. And they spell disaster for anything that is stored in the freezer, unless you have an independent back-up power supply.

Luckily, there are many other options as we can learn from history. How did people manage to store things in the days before electricity lit up our world? After all, it is a fairly new invention!

It turns out, our ancestors have been incredibly innovative when it comes to devising methods of preserving foods, although not all are equally suitable for all types of foods and vegetables.

To begin with, it is helpful to consider the growing cycle. The natural life cycle of a plant starts with germination. Gradually, the plant develops and grows and eventually reaches its peak. This process is known as maturation. Most plants are harvested at their peak. From that point on they begin to decay.

No process of preservation can halt this natural cycle of growth and decay, it can only slow it down, or in some ways, progress it. The ultimate aim is to preserve as much of the mineral and vitamin content of a given fruit or vegetable as possible.

Clamps

In the old days, root vegetables such as potatoes, carrots and parsnips were stored in the cellar. They were kept in boxes filled with earth, which were periodically sprinkled with water to keep them moist. In fact, the original purpose of cellars was to provide a cool, dark storage space for foods. Originally, they would have only had a dirt floor. This creates a moist, cool atmosphere that is able to ‘breath'. Unfortunately, modern houses, with their concrete foundations, insulated basements and concrete floors are much less suitable for storing vegetables. That is why people came up with the idea of these special boxes, which imitate the natural conditions.

But even without any kind of basement it is still possible to store vegetables - in a ‘clamp’. A clamp consists of a mound of root vegetables that is laid out on a thick layer of straw, which in turn is covered with earth. Alternatively, one can dig a pit. The base is laid out with wooden planks and straw. The vegetables are stored in the next layer, which is covered and covered with sand and earth. (For instructions, check with a good book on self-sufficiency).

It is important to ensure ventilation - e.g. by allowing the bottom layer of straw to peek through beneath the covering layers of soil. Unfortunately, these methods only work in places where winter temperatures don't fall too low.

Carrots can be stored in containers filled with sand (or in clamps, as described above). They should not be washed and must not be damaged, otherwise they will rot. The green parts should be removed.

Sunchokes, parsnips, leeks, celery and Brussels sprouts can remain in the ground. Mild frosts don't bother them. If need be, a layer of soil, straw or mulch will protect them against damage from hard frosts. Cauliflowers can be 'planted' (with roots attached) in boxes filled with sandy soil. They should be sprinkled with water once in a while.

Root vegetable clamps

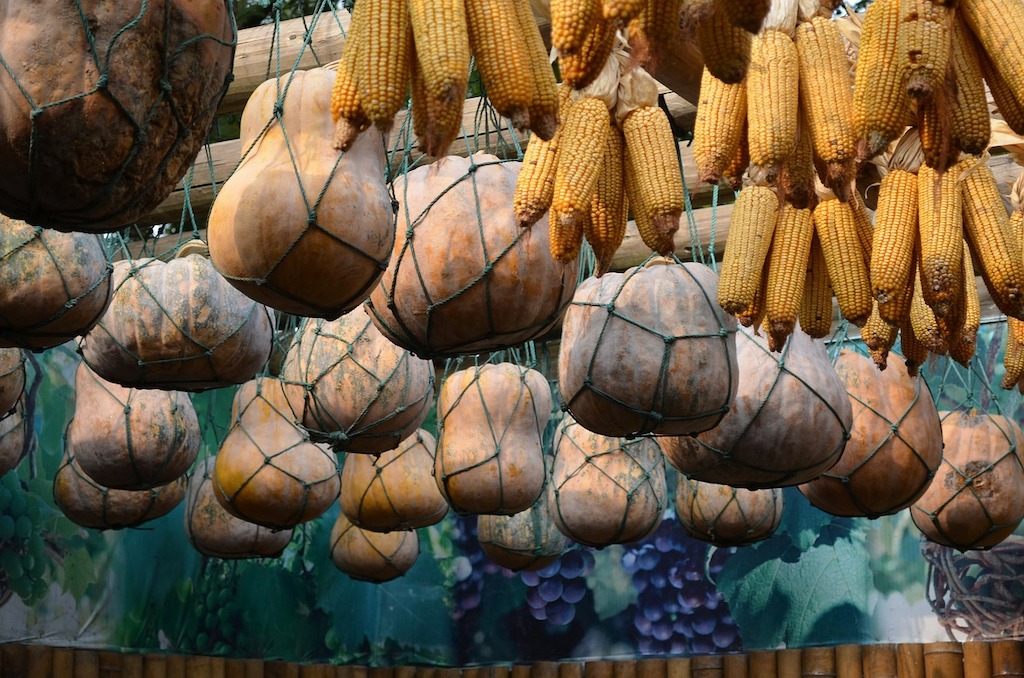
For a limited period of time, cucumbers, melons and pumpkins can be stored in suspended nets.  But their high water content makes them liable to rot, especially if they have been bruised.

Onions and garlic should be spread out in the sun until the outer layers dry and turn papery. Thereafter, they can be bundled and hung.

Apples can be stored in a cool, moist, but aerated basement. But, they must be handled gently. Bruised apples will rot. Late varieties are more suitable for long-term storage. Early varieties are better used for immediately. Ideally, apples should be picked as late in the season as possible, when they come off the tree without effort. They should be spread out to dry for a day or so, and then stored singly (wrapped in paper, if possible) and placed on a shelf or in small cardboard storage boxes. Pears can be stored the same way, but prefer slightly cooler temperatures.

Chestnuts keep well in clamps. Check for tiny holes in their shells, which is a tell-tale sign that  they are infested with worms. Pulses and grains can be stored in hessian bags. The bags can be treated with neem spray to deter bugs. Shake the bag occasionally to inhibit the development of insect larvae.

Dehydration

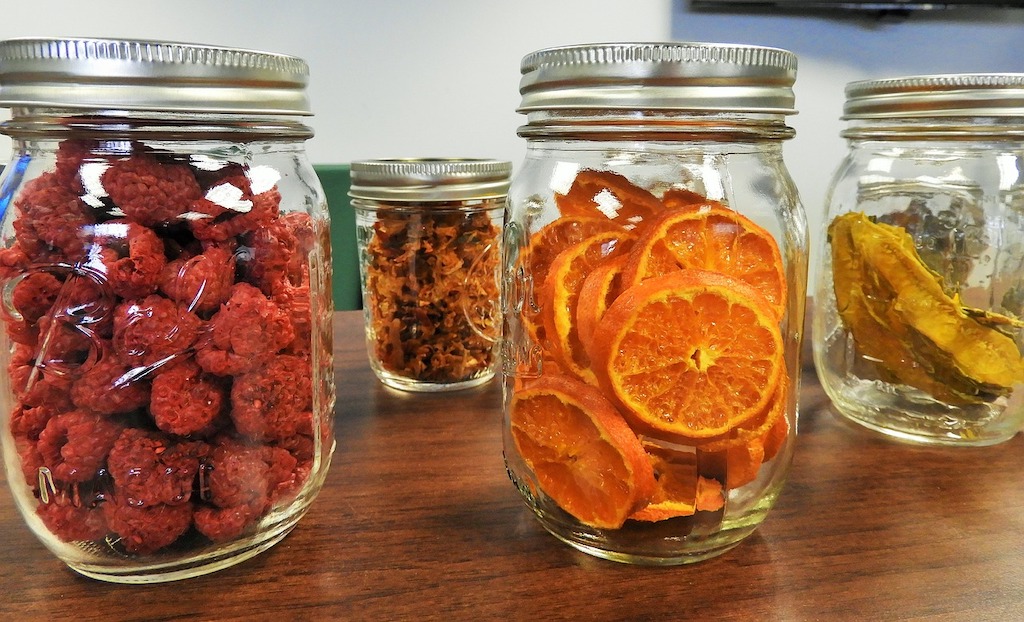
One of the best methods to preserve fruits and vegetables is to dehydrate them. This method has the advantage that the ‘natural goodness' is largely preserved, since only the water is extracted. In hot and dry climates, vegetables and fruits can be dried in the sun, or on special racks. In the colder time of the year, the rack is placed near the fire place or oven. It is difficult to sun dry fruit and veggies in modern apartments. However, one can use the oven to help the process. Arrange the prepared fruit on racks (rather than cookie sheets) that are lined with baking paper. Obviously, thin slices dry faster than thicker ones and juicy fruits take longer than dryer types. The greatest difficulty is to get the temperature right, since many of the nutrients are destroyed at temperature above 40°C. The lowest setting on the dial is usually 50°C degrees (100F). It is better to dry things at a lower temperature for a longer period of time. Keep the oven door slightly ajar to modify the temperature and to let the steam escape.

But even so, keeping the oven running for long periods of time is not very energy efficient and is also a nuisance during the summer, when it is difficult enough to keep the room temperatures bearable.

The best option is a dehydrator. The lower the wattage, the lower the electricity use will be. The best models are expandable (all you to add extra racks), have a timer and an accurate temperature regulator.

To prevent discolouration dip fruits that are vulnerable to oxidation in lemon water (50:50) before drying them. This preserves the natural color. Once dry, and aired out, store the dried goods in air-tight containers (storage jars). Dried fruit and vegetables can keep for ages, as long as they are stored properly. But if they absorb moisture from the atmosphere they will go moldy.

Very juicy fruit should drain for a period of time to reduce the amount of moisture (e.g, pineapple) before drying. Cut the fruit to the desired size and drain in a colander for at least an 1 hour.

Air-drying fruit also has advantages and disadvantages. The main advantage is that it saves on electricity and can be done at a lower temperature, which preserves the vitamins. The disadvantage is that the drying fruit will attract fruit flies. Prolonged drying also encourages mold.

Drying fruit and vegetables correctly requires a bit of practice. Dehydrators make the process a great deal easier and less messy. A major advantage is that the dried material takes up much less space which is handy for storage. Also, dried fruit and veg keep well for long periods of time if stored correctly.

Fruit Leather

Spread pureed fruit blended with honey and ground almonds, or hazelnuts on baking paper, and dry.  Fruit Leather is a very popular snack that also makes an excellent, instant energy, hiking food.

Dried vegetables can be rehydrated by soaking them for a few hours in enough water to cover them; slowly cook them with the remaining water. It took time to remove the water, and it takes time to reabsorb it. If prepared too quickly the veggies will be chewy. The smaller and thinner the slices, the quicker they will reabsorb the water.

dehydration

Lacto-fermentation

Everybody knows (and some actually love) Sauerkraut. But not all Sauerkrauts are created equal. Most commercially available types are produced using salt and vinegar and are pasteurised, which unfortunately, kills off the probiotic substances that make fermented foods like Sauerkraut so beneficial.

Sauerkraut is not the only way in which Cabbage can be fermented. A more interesting variation (to my taste, at least) is Korean Kimchi, which consists of a combination of different vegetables and spices. There are dozens of recipes and plenty of scope for experimentation.

The method of lacto-fermentation is simple, providing one has the right equipment. It does not take much, except a special fermentation crock-pot with a grooved rim. This rim should be half-filled with water, which, once covered with the lid, creates an airlock that prevents air borne bacteria or fungal spores from entering the pot. Another necessary item is a stone or weight to push down the vegetables and keep them submerged in the juices. For smaller amounts, airtight jars (pickling jars) can be used instead.

Cabbage, carrots, cauliflower, onion, garlic, horseradish, celery, bell peppers and pepperonis are well-suited for lacto-fermentation.

Suitable pickling spices include mustard seeds, peppercorns, allspice, juniper, cloves, fenugreek, ajowan, coriander, cumin, chillies, dill, fennel, tarragon, and bay leaves.

Finely cut or shred the vegetables and pack them tightly into the crockpot; sprinkle the spices between the layers of veggies. As the final layer, cover the veggies with a large cabbage or horseradish. Horseradish leaves will help to prevent mold. Prepare enough brine (1oz salt per liter of water) to pour over and cover the vegetables, but don't fill the jar all the way to the top. (You can add a little whey to aid the fermentation process).

If you use fermentation crock-pot, half fill the rim with water (air-lock), place the stone on top of the vegetables and cover with the lid. Keep an eye on the water level in the airlock and replenish with water if it starts to evaporate. Place the jar or crockpot in a warm place for about 10 days, then move it to a cool one for another 6 weeks. Remove any mold that may have formed on the surface. Avoid removing the lid unnecessarily.

Canning

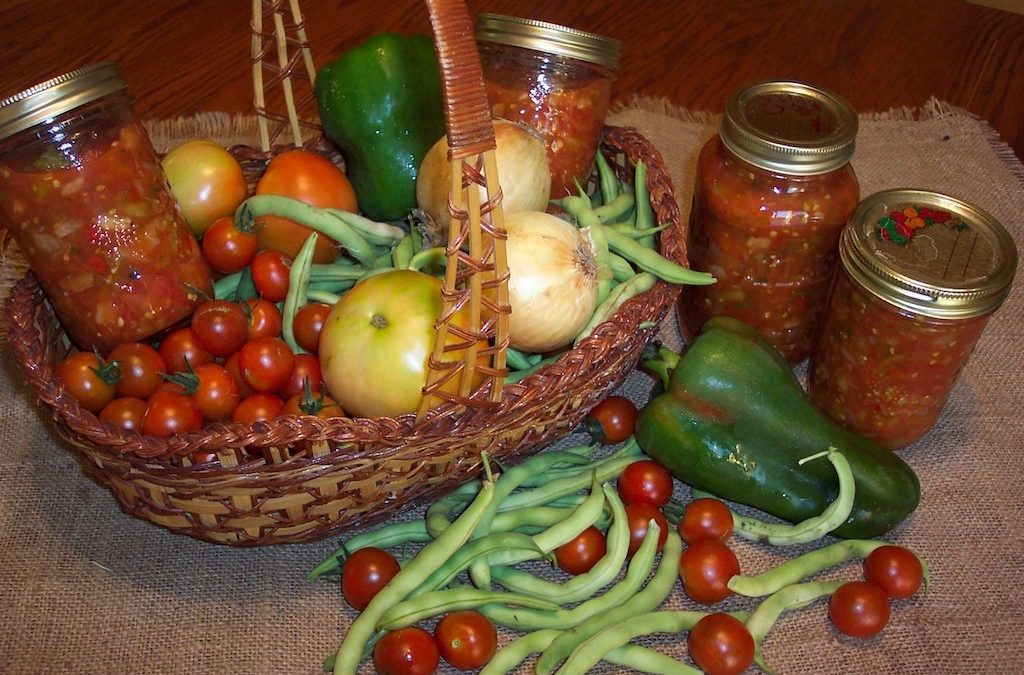
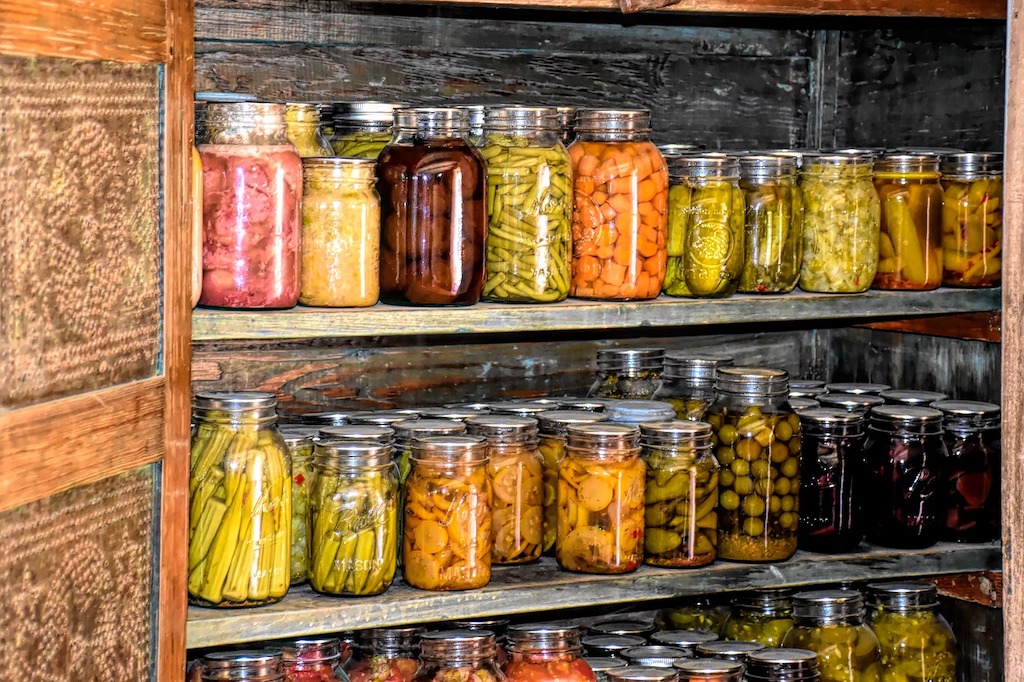
Canning is a great way to preserve foods. Almost anything can be canned and stored for later - and canned goods keep indefinitely, theoretically, at least. In practice, it is recommended to use canned foods within a year or two.

There are basically two different canning methods, one that is suitable for high acid foods, such as fruit, juices, and pickles, and one that is suitable for low acid foods, such as most vegetables, or meats.

There are many good canning recipes and it is best to choose a tried and tested one to avoid disappointment - especially if you are new to canning.

High acid foods are a little easier to process, as they do not require extreme heat to preserve them. Ordinary boiling is sufficient as the acid content inhibits the growth of harmful bacteria. Certain kinds of equipment make the process a great deal easier.

To preserve high acid foods, you need a large pot and rack (for holding the jars in place above the bottom of the pan), canning jars with two-part lids (lid with a rubber rim and band), a canning funnel, a jar lifter and lid magnet. A 'head space' measuring tool and bubble remover can also be useful.

The most important thing about canning is to make sure that all the equipment is squeaky clean and that the produce is immaculate and fresh. Don't be tempted to preserve items that are on the verge of going off, or you will ruin the whole batch.

Prepare the foods according to your recipe, fill into the jars, and cover with a rubber ring and lid. The lids  are held in place with a special little clamp. Canning machines have a rack that is placed at the bottom. If you are using a large pot, you need to find a rack that fits the pot. Place the jars on top of the rack and cover with water . Boil for a set amount of time (according to your recipe) to sterilize the jars.

For a detailed description of the process see:

Canning High Acid Foods

Low acid foods require more care. Since they lack naturally occurring acids, they must be heated to a temperature that is well above boiling to kill any pathogens that otherwise might spoil the fruits of your labor. To achieve such high temperatures you will need a pressure cooker, preferably a purpose made one with a pressure gauge and thermometer.

As with the high acid foods, it is recommended to use a tried and tested recipe. Fill your food into clean jars, cover with lids and place the jars on the rack. Cover with water and sterilize according to the instructions of your recipe.

For a very useful and detailed description of the process, see this presentation:

Canning Low Acid Foods

Pickling

Instead of fermenting foods, many vegetables can be pickled in vinegar. This method is not as wholesome as the lacto-fermentation mentioned above, since it does not create probiotic bacteria in the process. Acid inhibits the growth of harmful bacteria, which is why it serves well as a preserving liquid.

The most important thing about pickling in vinegar is to use non-metal (except stainless steel) and non-plastic containers. Acids can react with such materials. Use glass or stoneware.

Fruit can be pickled in a vinegar /sugar syrup, to make delicious condiments.

Vegetables are often salted for a period of time (overnight) in order to draw out some of their water and to soften the skin. Wash and simmer them for a few minutes before covering them in vinegar and pickling spices. But not for too long. You’ll want the veggies to stay crunchy.

Some recipes call for a vinegar /sugar others for a vinegar /brine blend. Some recommend the vinegar to first be heated (and simmered with various spices) and then cooled before pouring it over the vegetables, other recipes call for hot vinegar. Pickling provides endless scope for experimentation.

Preserving in Oil

Oil in itself does not ward off bacteria, but it creates an effective barrier and thus prevents oxidation. To preserve vegetables in oil they are usually cooked in either brine or vinegar first, for a short period of time. The idea is to preserve the crunchiness. Place the veggies into a jar and cover with oil. Start with a layer of oil before adding the veggies, as this will prevent air bubbles. Make sure the contents remain covered in oil even once you start to use the preserve. Use good cooking oil - olive oil is ideal, as it has a good balance of fatty acids and resists oxidation.

Preserving in Sugar/Syrup

That sugar isn’t healthy is not the latest discovery of science. It depletes vitamin B1 and calcium and destroys the teeth. However, for certain things sugar is an ideal preserving agent - just as with any other harmful substance, there is a direct correlation between the level of damage and the amount consumed. Sugar preserves include jams, jellies, marmalade, syrup and candied fruit. For jams and jellies it is usually necessary to add pectin (or use preserving sugar) in order to achieve the proper consistency.

If you use lemon or orange peel in your recipes make sure it comes from organic citrus fruit.

Preserving nature's bounty is an art and no novice will immediately master all methods. But it is a great joy to preserve the harvest and to create unique tasty treats, just exactly the way you like them. No commercial enterprise can even come close to that. All it takes is a spirit of experimentation and discovery.

It is also a lot of work - but it is SO worthwhile when, in the midst of winter, you can still feast on jars and cans filled with the sunshine and goodness of the previous harvest.

Resources:

National Center for Home Food Preservation

FAO Leaflet Small-scale Post-Harvest Handling Practices

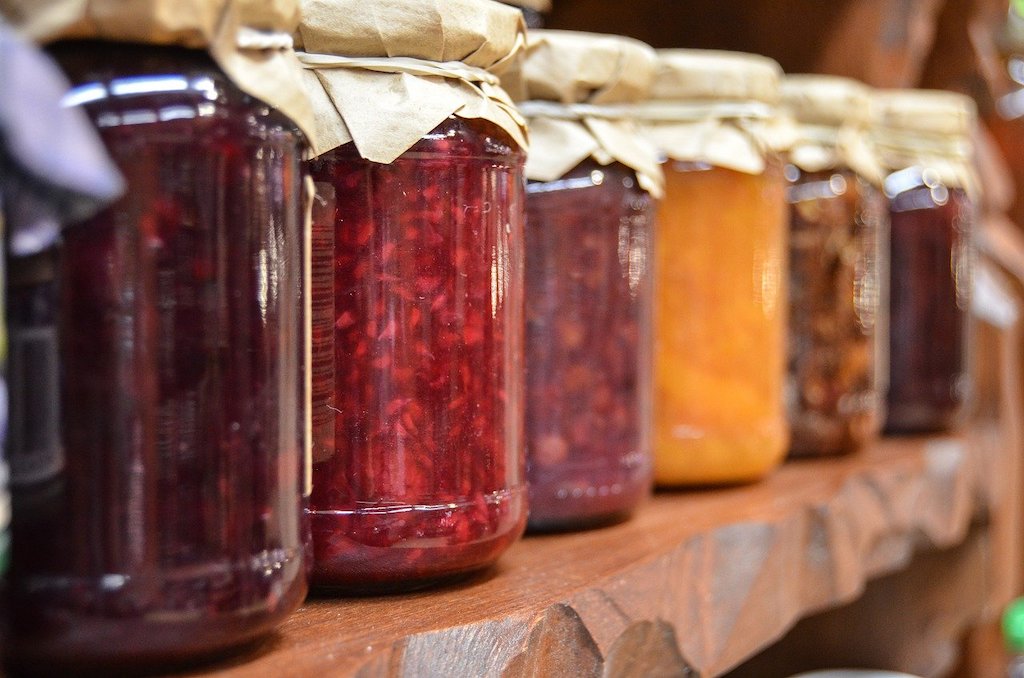
jam
What is Foraging?

What is Foraging?

Foraging - connecting with nature through the senses


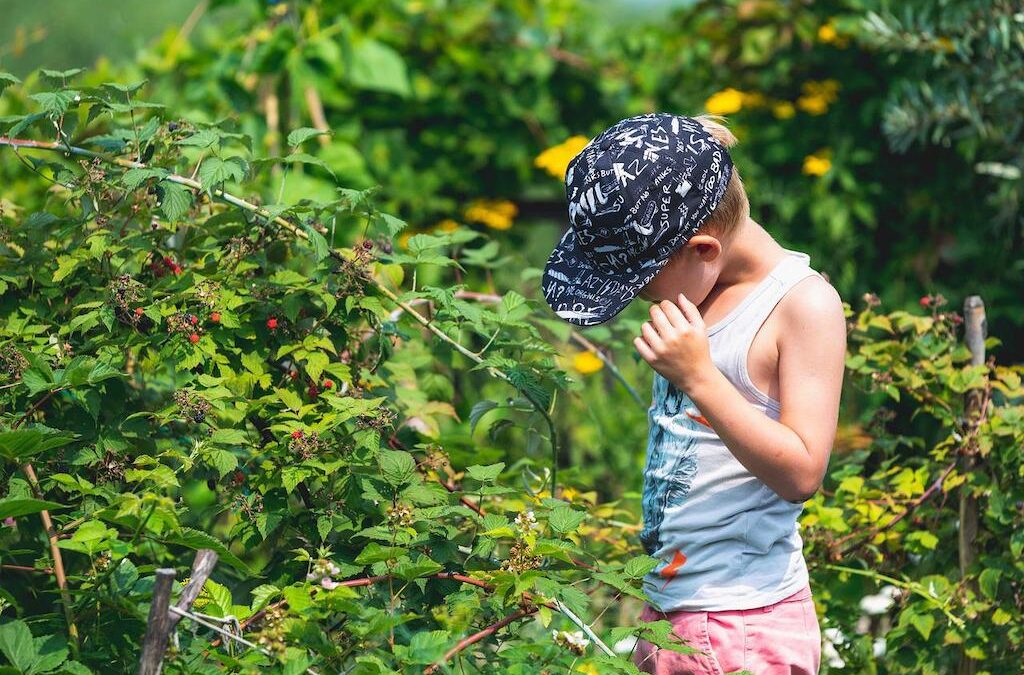
I became a forager at the age of 5, and I suspect many of you did, too. My early childhood memories are filled with berries of all kinds: wild strawberries, raspberries, blackberries, and above all, blueberries. They covered the forest floor so densely that it was difficult to set down your foot without squashing them. 

The summer holidays were pure berry bliss as I munched my way through the landscape like an insatiable caterpillar.

These early sensuous experiences sowed the seeds from which, in time, my passion for nature sprouted. 

Nothing can forge a deeper connection to nature and the land than such total immersion - learning by smelling, tasting, eating, feeling and playing with what nature provides in abundance. We learn by doing, observing and asking questions about what we can directly experience. These sensory impressions form the foundations of our understanding of the world. 


 We learn to understand processes, to see patterns from which we deduce meaning. Such intense observation creates a deep relationship with the observed. We are no longer separated, but deeply and empathically involved. A sense of familiarity and caring develops and gradually grows. A great way to stimulate this learning process is to become a forager.


What is foraging?

The term ‘foraging’ is often associated with animals roaming around looking for food. Different animals forage for different kinds of food. A hedgehog looks for beetles, snails and fallen fruit, while gorillas sustain themselves only on leaves. 


As ‘civilized’ human beings, we mostly forage at the supermarket. Everything is always available, and most of us have lost any sense of connection to the cycle of the seasons and the different foods they produce - unless they are gardeners, of course. But before we began domesticating wild species of plants and animals, we incorporated a wide variety of wild species into our diets. 


Picking berries or hunting for mushrooms is still hugely popular, especially in times of economic hardship. Some of us continue to forage for part of our diets - not just to save money on the grocery bill, but simply because we love it. We love the connection with the land and the variety of foods and flavours each season provides. Besides, wild foods tend to have a vastly superior nutritional profile compared to industrially farmed produce.


What are wild (plant) foods?

Wild food plants are simply edible plants that are not under cultivation. But the dividing line between wild and cultivated foods can be very vague. Many wild edibles are the undomesticated ancestors of the plants we find at the grocery. Some wild species used to be cultivated and sold on the market but are no longer grown today. Gardeners even curse them as weeds. 


Some fruits and nuts are cultivated and found in the wild. The cultivated varieties are bred for specific traits and qualities, such as shelf-life. Their wild cousins tend to be smaller but are often more flavourful.


Whether we can digest any given wild plant is determined by our physiology. Certain plants that would kill us are perfectly edible for other animals. 


How to become a forager?


Foraging is a skill that must be learnt like any other. 

The best method to learn is to find a knowledgeable mentor or join foraging walks and classes in your neighbourhood.

But there is also much you can learn on your own. 


Essential foraging skills:

Learn all you can about your environment

Observe closely, and ask questions: 
What kinds of trees, bushes and wildflowers grow here?
Which animals feed on them? 
Do certain plants always grow together? 
What is the soil like, chalky or loamy, wet or dry? 
Do you know what the farmer sprays on his nearby field? 

Learn plant identification skills

Foragers must learn basic botany and become familiar with the transformative processes of plants. Learn to recognize them at different stages of their growth cycle. Some species are edible at one stage, but toxic at another. 

Learn the seasons

Each season brings forth its special treats, but seasons are not fixed by a calendar. If you know how to read the signs of nature, you will recognize when the time to harvest a specific herb or fruit has come.

Learn how to care for your environment

As foragers, we are stewards of the land, not pillagers. We must not only take but also give back to nature. Remember that you are not the only hungry one out there. Others (human or animal) also depend on the gifts of nature.

Cautions:


Never ever rely on your intuition alone! Even deadly plants and fungi may look, smell or taste deceptively appealing!


Learning everything you can about your environment is the most essential skill a forager must develop.


Always test for allergies before tucking into a foraged feast. The body can be finicky when we ask it to accept foods it has never previously encountered.


And finally - knowing your land also means learning about dangers that may lurk in the undergrowth: snakes, insects (ticks!), wild boars, or even bears, depending on where you live.


Resources:


There are many knowledgeable people out there who teach foraging as a craft - too many to name them all here.

But here are a few useful books. (As an Amazon Associate, I earn from qualifying purchases.)

Keep in mind that each bioregion is unique. There are many differences concerning microclimates, seasons, and habitats. Obviously, I can't cover them all. I focus on my local bioregion, which is Central Europe.

Star of Bethlehem

Star of Bethlehem

Plant Profile: Star of Bethlehem (Ornithogalum umbellatum)


Family: Liliacae /allium family


I recently took up nature journaling, and when I sat in the garden looking for a suitable motif, I suddenly noticed a Star of Bethlehem growing at my feet. I had seen them in the vineyards many times, but hadn’t noticed them moving in with me. 

Apart from giving them a friendly nod, I had never paid much attention to them. As far as I knew, they were not used for food or medicine; but hang on - didn’t Dr Bach revere this little flower and give it a prime spot as part of his Rescue Remedy formula?

I decided to take a closer look and dropped to my knees to study it in detail. I was immediately smitten by the Star’s sublime beauty and unusual features.


What is the Star of Bethlehem?

Star of Bethlehem is a small perennial bulbous plant of the Lily family (Asparagaceae). Its leaves die back even as it begins to flower. After flowering, its energy retreats into the underground bulb. During the ‘dormant’ period, it produces little bulbils that send up their own narrow leaves early in the following spring. The Star of Bethlehem is thermoperiodic, meaning that it needs to go through a period of low temperatures before it begins to flower. 


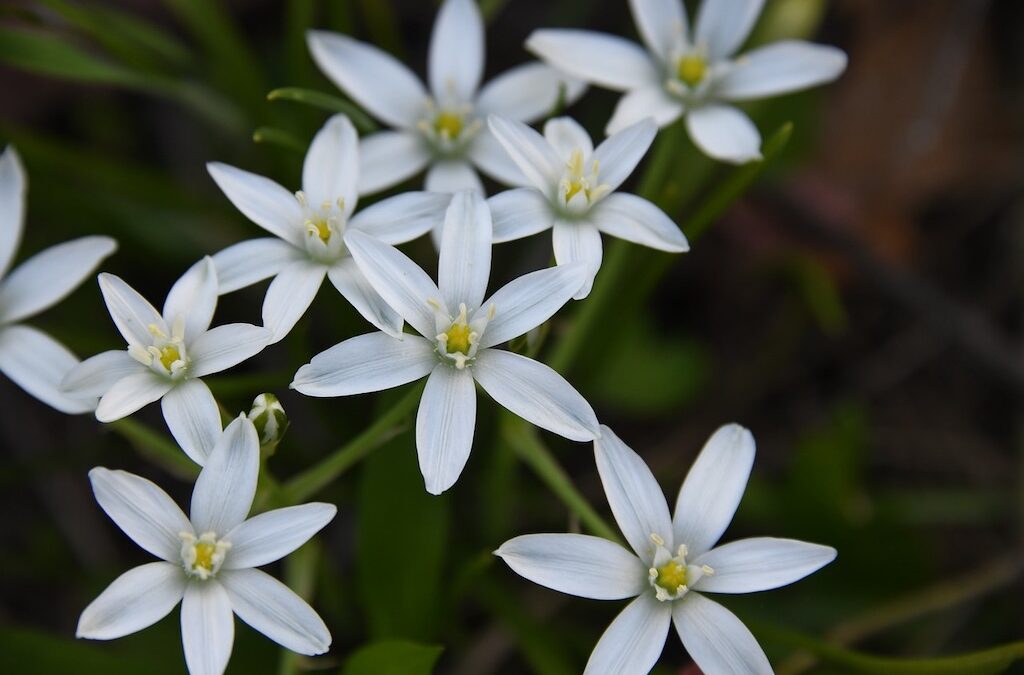
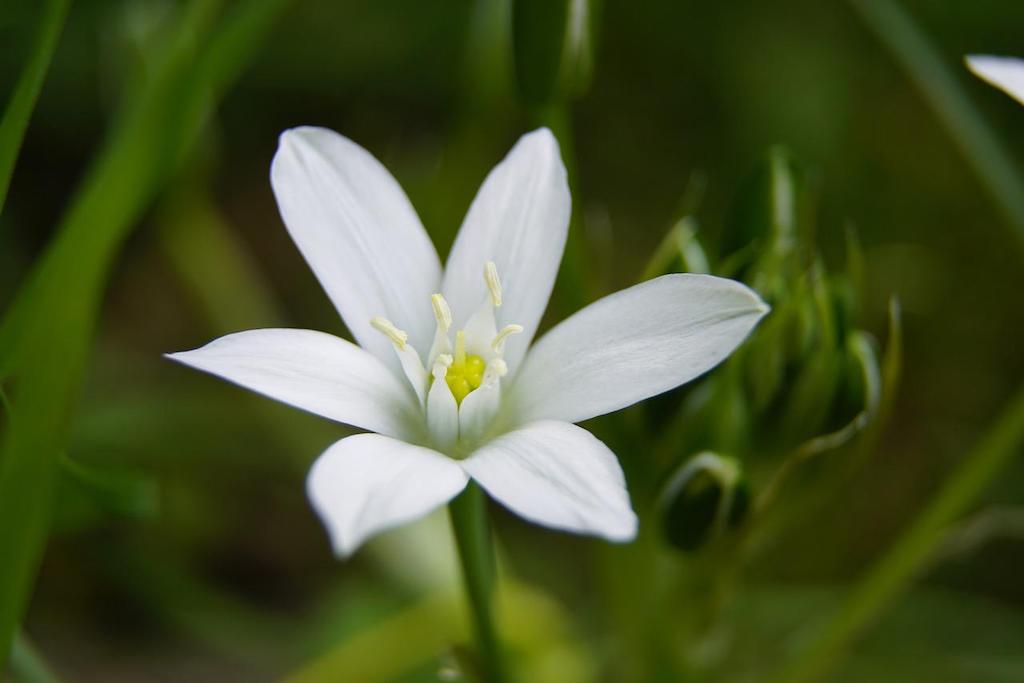
The pretty, star-like flowers appear between April and June. The white petals have a green stripe on the underside that is only visible when the flower is closed. It looks as if the petal has fused with the sepal. But in fact, botanical descriptions of the plant say that the flower is composed of three identical sepals and petals, displayed in a single whorl. It is impossible to tell the difference, so botanists call them tepals. In the centre of the flower is a little crown of what looks like six white petals tipped by the pollen-bearing anthers. They enclose what looks like a little six-pointed star, from which the pistil protrudes.


Where does Star of Bethlehem grow?

You can find Star of Bethlehem growing in many places throughout Europe and North Africa. It arrived in the United States as a garden plant, which has naturalized to such an extent that the USDA now considers it a pesky weed.


Where did the name ‘Star of Bethlehem’ come from?

The origin of the name is attributed to various stories. The most obvious explanation is its widespread distribution in the Middle East and the Mediterranean Basin. Pilgrims on their way to Jerusalem carried the dried bulbs as food. (But fresh bulbs are reported as poisonous to cattle.) Another myth claims that the flower sprung from fragments of the Star of Bethlehem.


Is Star of Bethlehem known by any other names?


Indeed, it is, but none as charming. Star of Bethlehem is also known as Sleepy Dick, Nap-at-Noon, and even 'Dove Dung'. 

Nap-at-Noon alludes to the flower's habit of 'going to sleep’ in the afternoon and on cloudy days. The name 'Dove Dung' seems a bit insulting, apparently implying that the white ‘splash’ of the Star resembles bird doo-doo. It doesn’t, and in fact, it is not a reference to the supposed likeness. Instead, the name is a literal translation of the Latin name Ornithogalum, which means ‘bird’s milk’, a common euphemism for avian excrement. The species name ‘umbellatum’ refers to the umbel-like flower.


Star of Bethlehem flower


History

Gerard describes it as a type of wild onion and quotes Dioscurides, who mentioned that the bulbs are edible. Both the bulbs and the green parts are sold at markets in Turkey (Central, Bulancak) (1). Yet, they are also many sources that claim it is poisonous. So, what is the scoop?


Is Star of Bethlehem poisonous?

Biochemical research confirms that Star of Bethlehem contains cardioactive glycosides that are potentially toxic. But further investigation showed, that they do not survive being subjected to digestive juices, which would explain the controversy. An early study published by Arthur Vogelsang in 1961 notes that the effect of Star of Bethlehem is quite different depending on whether it is taken orally or injected. To test his hypothesis and confirm that the coating prevents the breakdown of the cardio-active compounds in the stomach. He compared Star of Bethlehem with Digitoxin and observed that its extract slowed the heart rate to a lesser degree than digitoxin while increasing the strength of the cardiac contraction and the excretion of body fluid. Star of Bethlehem also caused less nausea. Overall, Star of Bethlehem is a gentle yet highly effective heart drug that can be given to reduce blood pressure, strengthen the pulse and increase the discharge of excess fluid. It is particularly helpful for patients that do not tolerate digitoxin well.


Note of Caution:

The specific growing conditions, such as exposure to sunlight, water and soil type, change Star of Bethlehem's chemical composition.


Is Star of Bethlehem used homeopathically?

In Homeopathy, the Star of Bethlehem is known by its Latin name, Ornithogalum umbellatum. It is used to treat persistent gastrointestinal problems, such as upper abdominal pain in the epigastric (central abdominal) region, pressure, malignant tumours of the digestive tract accompanied by depression, and feeling drained and exhausted. It is also indicated for patients suffering from a state of nervous exhaustion with high sensitivity to all types of stimuli.


What are the indications for Star of Bethlehem Bach Flower Remedy?

For Dr Bach, Star of Bethlehem was one of the most treasured flower remedies. He used it as a go-to Trauma remedy to buffer the effects of shock, such as unexpected bad news, the sudden loss of a loved one, an accident or other traumatic event. It can also help when facing the pain of past traumata (PTSD). It is one of the essential components of Rescue Remedy.

Foraging Daisy (Bellis perennis)

Foraging Daisy (Bellis perennis)

Foraging Daisy (Bellis perennis)

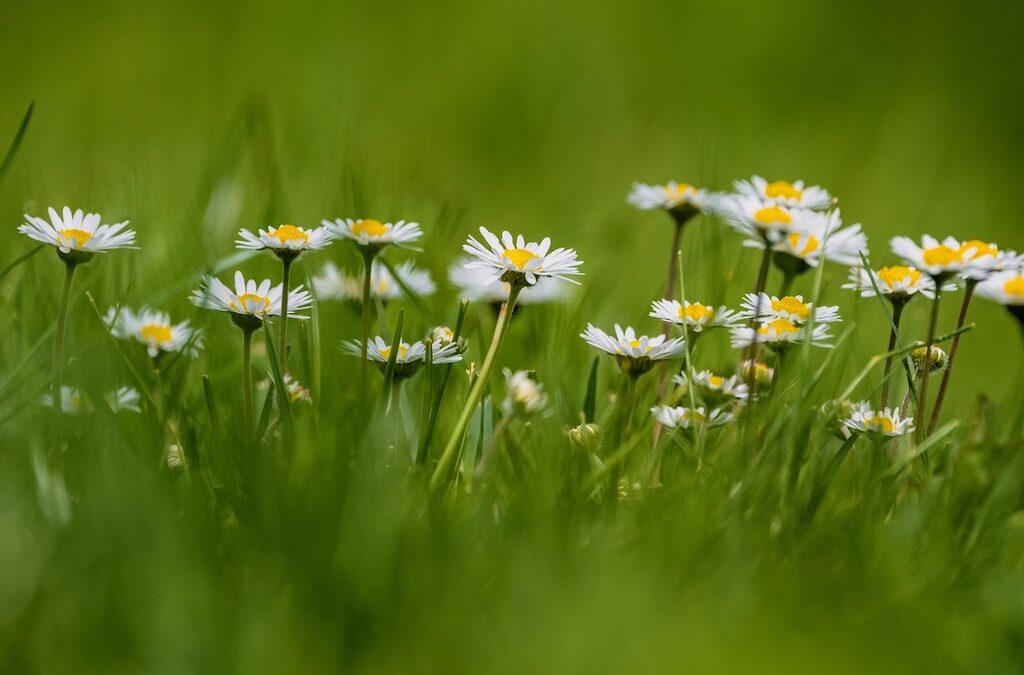
The dainty Daisy is a picture of innocence: it seems to have been made for adorning children’s heads. But there is a lot more to these lovely little flowers than meets the eye.

Etymology

The English name 'Daisy' means 'Day's Eye' because the Daisy opens its flower head in the morning and closes it at night.

But the origin of its Latin name is a lot more surprising and somewhat controversial. Bellis means 'pretty' - an obvious choice for this little herb. But Mrs Grieves thinks it may have been named after a dryad known as Belidis. Another common name is ‘Baldur’s Brow’, linking the Daisy to the Norse Sun God Baldur. Another association links it to Bellona, a Goddess of war. Judging only by its appearance, this suggestion seems improbable, but its traditional medicinal uses give a deeper insight.

Properties of Daisy

Daisies first appear around the Spring Equinox, when the Sun enters Aries, which is ruled by Mars. The ancient herbalists used Daisy as a vulnerary - an herb to treat wounds, and as an anti-inflammatory and diaphoretic,  for treating fevers. Inflammation, fever, and wounds all suggest a ‘Martian’ connection.

Mars also leaves its signature on the taste sensation. The leaves and roots are quite astringent, almost hot, but very unlike the heat of chillies. Instead, it is a spreading, radiating warmth, not a blistering burn.

The leaves are a little rough and moist, and have a demulcent quality. The old herbalists found Daisy’s heat suitable for treating conditions characterized by retracted, cold phlegm. Daisies loosen congestive conditions caused by an excess of cold moisture -as the ancient herbalists would put it.

Modern clinical herbalists have all but forgotten the pretty English Daisy. They use her sister, the Ox-Eyed Daisy, instead. Both can be used for similar complaints. Ox-Eyed Daisies are an excellent remedy for chronic bronchial conditions, asthma, and whooping cough. It is also used to treat nervous excitability and, prepared as a lotion or ointment, as a wound herb.

Wild herbs are not only nutritious but also therapeutic - and none more so than the early spring herbs. They often provide just what our bodies need to restore vitality after fending off winter bugs.

Daisy as Wild Food


Recipes


Daisy in the Salad:

Daisy leaves and flowers can be added to spring salads. The young, tender leaves are rich in vitamin C, and their heat produces a diaphoretic effect.

Daisy Capers:

Conventional Capers are made from the unopened flower buds of the caper tree (Capparis spinosa.) But inventive foragers use the same method on other flower buds, such as Daisies or Dandelions (only use edible flowers!)

The basic recipe is quite simple:

Pick about one cup of Daisy buds, wash, and cover them with about 500 ml of salted water. Quickly bring to a boil and strain through a cheesecloth or finely meshed strainer.

Place the buds into a stone jar and pour 500 ml of boiling vinegar over them.

Make sure they are completely covered.

After about 4-5 days, pour the buds and vinegar into a pan and, making sure the buds are covered, bring to a boil.

Let them cool, jar and cover with jam cling film to prevent the buds from coming into direct contact with the air and turning mouldy.

Daisy Soup:

Daisy soup is quick and easy to prepare and can be made at almost any time of the year. Use all parts of the plant: roots, leaves and flowers. (Only use the roots if Daisies are prolific in your area.) Picking the plants is easy, but if you have heavy clay soil, be prepared for clots of dirt to cling to the roots, making cleaning them tedious.

Pick about 6-8oz of flowers (roots, leaves and tops), clean well and chop them up (not too small).

Quickly sauté them in a heavy pan with a few drops of olive oil.

Add half a cup of white wine or apple cider, let the alcohol fly off, and stir in 1 litre of vegetable broth. Season to taste and finish off with a dash of cream. Serve with croutons.

#Ads

Disclosure: As an Amazon Associate, I earn from qualifying purchases.