
Vegetable Oils-Liquid Gold
This article is about common and uncommon vegetable oils derived from seeds, nuts and, in some cases, fruit pulp.
Vegetable oils:
Vegetable oils have been called ‘liquid gold. That is because they are a source of nutritionally valuable fatty acids, vital dietary components. But their range of applications goes much further, from everyday food uses to medicinal and cosmetic uses and even industrial processes.
Seeds and nuts are the most important sources of high-quality oils, although some are derived from fruits and vegetables. While all vegetable oils are composed of fatty acids, their individual profiles vary greatly. Their quality does not only depend on their composition but rather on the method of extraction.
Many oils, including common cooking oils, are solvent extracted and highly refined. The advantage of refined oils is their extended shelf-life. But refining removes most of the unsaturated components and thereby destroys or extracts most of the nutrients.
The best cooking oils are ‘cold pressed’, rather than refined.
Methods of Extraction:
Refined oil
Pressing oil from seeds and refining it for human consumption is an elaborate process. The raw material (usually seeds or nuts) first must be cleaned and shelled. Then it is heated to facilitate the extraction process. Next, they are pressed. Modern mills are complicated industrial machines. The pressure necessary to express the oil produces an enormous amount of heat. The press cake must therefore be cooled throughout the process.
Oils that are not cold-pressed contain all sorts of undesired compounds that make the oil unpalatable. This necessitates refinement to remove the undesirable components.
Solvent Extraction – refining oils
Some raw materials are not that rich in oil, but the types of oils that they contain are rare and precious. Such oils do not easily yield to pressure but must be extracted with hexanes, which are solvents. The term ‘Hexanes’ refers to a mixture of hexane in combination with other isomeric compounds. Hexanes are a by-product of refining crude oil, and they are toxic to human health. When used to extract edible oils, these hexanes must be removed again to render them safe. This is achieved by heating the mixture to about 60 °C.
The extracted oil must then be refined to purify it and remove any unwanted substances and residues. The oil is washed in a watery sodium base liquid (industrial soap), causing certain compounds to separate or clump together so that they can be filtered out. Refinery basically means putting an oil through a chemical mill to make it fit for human consumption. From the industry’s perspective, the chief advantage of refining oils is that it produces a much greater yield, and the shelf-life can be extended to well beyond a year.
Cold Pressed Oils
Cold-pressed oils are of much higher quality since nothing is added or removed from them. They are extracted by simple mechanical pressure. This is done very slowly while simultaneously cooling the press cake. The oil must not get hotter than 40 °C lest its valuable compounds are destroyed. Cold-pressed oils are expensive because the yield is much lower compared to refined oils. Nor is the shelf life as long, but the nutrient profile and flavour of cold-pressed oils is much richer and more complex. High-quality cold-pressed oils have a nuanced bouquet of flavours, just like good coffee or wine. No two oils ever taste the same.
Find organic oils, essential oils and other ingredients at Starwest Botanicals
- Sweet Almond Oil (Prunus dulcis
- Apricot Kernel Oil (Prunus armeniaca)
- Argan oil (Argana spinosa)
- Avocado (Persea americana)
- Babassu (Orbignya oleifera)
- Black Cumin Seed (Nigella sativa)
- Black Currant Seed (Ribes nigrum)
- Borage (Borago officinalis)
- Castor oil (Ricinus communis)
- Coconut (Cocos nucifera)
- Corn oil (Zea mays)
- Evening Primrose (Oenothera biennis)
- Grapeseed (Vitis vinifera)
- Hazelnut oil (Corylus avellana)
- Hemp (Cannabis sativa)
- Jojoba (Simmondsia chinensis)
- Kukui Nut (Aleurites moluccana)
- Flax/ Linseed (Linum usitatissimum)
- Macadamia (Macademia integrifolia)
- Neem (Azadirachta indica)
- Olive (Olea europaea)
- Palm (Elaeis guineensis)
- Peach (Prunus persica)
- Peanut (Arachis hypogaea)
- Pumpkin Seed (Curcubita pepo var. styriaca /syn. var. oleifera)
- Rapeseed/Canola (Brassica napus)
- Rosehip Seed (Rosa rubiginosa)
- Safflower (Carthamus tinctorius)
- Sesame (Sesamum indicum)
- Soy oil (Soja hispida)
- Sunflower (Helianthus annuus)
- Walnut (Juglans regia)
- Wheatgerm (Triticum sativum)

Sweet Almond (Prunus dulcis)
A light, gentle oil derived from almond seeds. This oil is nutritionally highly beneficial and may be used for culinary purposes (best to use organic). According to research, it has an impressive ability to reduce cholesterol levels. However, most Almond oil is bought by the pharmaceutical and cosmetics industry and used for salves, ointments, massage oils, crèmes and lotions. Thanks to its gentle nature, it is suitable for use as baby oil. The skin readily absorbs it, and its perfect viscosity never leaves a greasy feeling. It is rich in essential fatty acids. Store in a dark, cool place to maximize the shelf-life.
Fatty Acids:
- Oleic- 64.8%
- Palmitic- 6.4%
- Linoleic- 26.1%
- Linolenic- 0.3%
- Stearic- 1.4%

Apricot Kernel (Prunus armeniaca)
Apricot oil is a light oil, even gentler than Almond oil. The kernels may be pressed or solvent extracted. This oil is not for internal use but has excellent properties if used as a cosmetic base oil for making crèmes and lotions or facial oils. Apricot oil is chemically similar to Almond oil and has a similar shelf life but is not quite as drying as Almond oil.
Fatty Acids
- Oleic- 64.2%
- Palmitic- 5.0%
- Linoleic- 28.3%
- Linolenic- 0.2%
- Stearic- 1.0%

Argan oil (Argana spinosa)
This edible oil comes from the nuts of a small desert tree found in Morocco. According to Moroccan tradition, the nuts must pass through the guts of the goats, who forage on these trees, before they can be processed. The nuts are then roasted and crushed. Submerging the pulp in water causes the oil to float on the surface where it can be siphoned off – no doubt, a labour-intensive process. The oil has a nutty smell and flavour and is rich in vitamin E, carotenes and phytosterols. It is a sought-after ingredient for therapeutic skin-care products for aged and damaged skin.
Fatty Acids:
- Oleic- 48.4%
- Palmitic- 12.6%
- Palmitoleic- 0.1%
- Stearic- 5.4%
- Gadoleic- 0.3%
- Arachidic- 0.2%

Avocado (Persea americana)
This trendy and delicious fruit is so rich in fat that it readily gives it up by simple expeller extraction. The oil is dark green and thick, almost solid when unrefined, turning brown when exposed to sunlight. Avocado oil is highly nutritious and beneficial for the skin. But as it is also very unstable, it goes off quickly. Avocado oil soothes irritated and inflamed skin, as well as burns and scars. It has excellent moisturizing properties and can help regenerate the elasticity of the skin. However, most commercial Avocado oil is refined, which removes many of its nutrients. The fatty acid profile is highly variable.
Fatty Acids
- Oleic- 36-80%
- Palmitic- 7-32%
- Linoleic- 6-18%
- Palmitoleic 2-13%
- Stearic 0.5-1.5%
- Alpha Linolenic 0-5%
Babassu (Orbignya oleifera)
Babassu is an oil palm whose nuts resemble small coconuts. It is native to the coastal regions of Brazil. Babassu is the third most important oil palm species in the world and is widely used for food and medicine. The oil is rich in saturated fats, thus not the best choice for culinary purposes. As a cosmetic agent, it has good moisturizing, emollient and cleansing properties. Babassu is used as an ingredient in suntan lotions, cleansing crèmes and lip balms. Babassu is especially beneficial for dry and brittle hair and can be used in hair care products. Commercially, it is used as an ingredient of soaps and detergents.
Fatty Acids
- Lauric- 50%
- Myristic- 20%
- Oleic-12.5%
- Palmitic- 11%
- Capric- 7%
- Caprylic- 4%
- Linoleic 1.5%
- Stearic- 3.5%
- Caproic 0.2%

Black Cumin Seed (Nigella sativa)
Also known as the cottage garden flower ‘Love in the Mist’, Black Cumin seeds yield a bitter, slightly spicy oil rich in unsaturated fatty acids. Its Linoleic acid and bitter components render it useful as a nutritional supplement and metabolic and digestive stimulant. It is also beneficial for conditions that affect the upper respiratory tract, such as asthma, bronchitis and emphysema. A few drops of the oil can be added to salad dressings, but most prefer it as soft gels. Its strong smell means it is not often included in massage oils, but in combination with the appropriate essential oils, it can produce an invigorating detox blend or enhance mixtures for inflammatory skin conditions such as acne and eczema. (It should not be used internally during pregnancy.)
Fatty Acids
- Oleic- 22.6%
- Palmitic- 11.7%
- Linoleic- 55.6%
- Linolenic- 1.0%

Black Currant Seed (Ribes nigrum)
Black Currant seeds are rich in polyunsaturated fatty acids that boost heart health. They fight chronic inflammation and have anticoagulant properties that help to prevent thrombosis. Many women find that adding oils rich in Alpha and Gamma Linolenic acids help regulate symptoms associated with the menstrual cycle. As a nutritive additive of cosmetic preparations, Black Currant seed has a revitalizing and moisturizing effect on mature skin, smoothing dryness and wrinkles. It provides the nutrients needed to restructure the natural elasticity of the skin.
Fatty Acids
- Palmitic- 6%
- Stearic- 5%
- Oleic- 11-12%
- Linoleic 47-48%
- Gamma Linolenic- 16-17%
- Alpha Linolenic 12-13%
- Parinaric 3%
- Gadoleic 1.1%

Borage (Borago officinalis)
A common herb of the Boraginaceae family, with delicate blue starry flowers, produces a highly nutritious seed with many valuable properties. Borage Seed oil is rich in GLA (gamma Linoleic acid). It is available in soft gels as a nutritional supplement to help regulate the menstrual cycle and ease menopausal symptoms. Borage seed oil can be used as a therapeutic agent to treat chronic inflammatory conditions such as rheumatoid arthritis, skin conditions and menstrual symptoms. As a nutritional ingredient in cosmetic preparations, it has restorative properties that are particularly soothing for sensitive skin and can be incorporated into moisturizing night crèmes.
Fatty Acids
- Linoleic- 30-40%
- Gamma Linolenic- 8-25%
- Oleic- 15-20%
- Palmitic- 9-12%
- Stearic- 3-4%
- Gadoleic- 2-6%

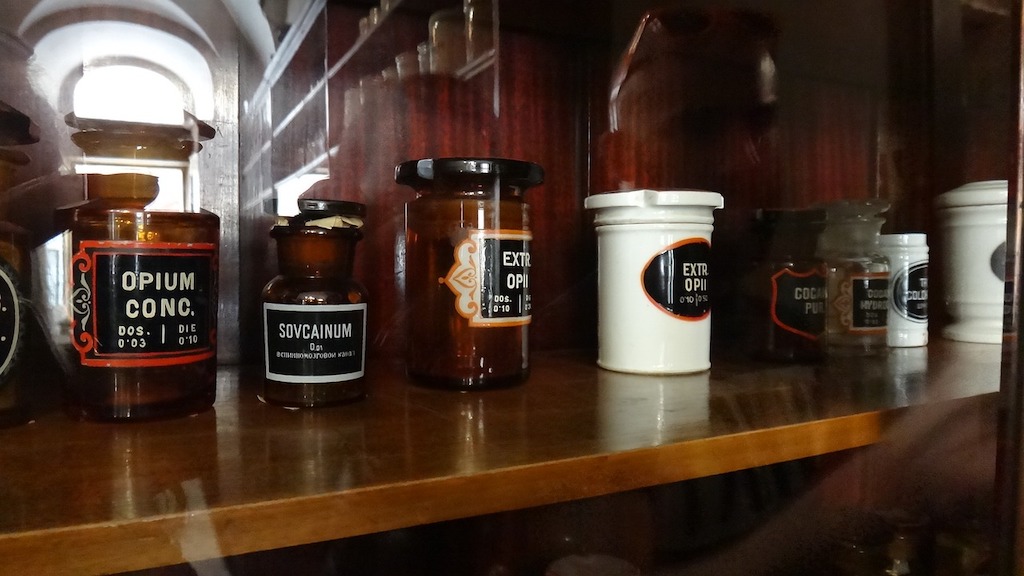
Castor oil (Ricinus communis)
Castor oil plants have been cultivated for medicinal and cosmetic purposes for ages but never for food, as the seeds are toxic, and the oil is powerfully purgative and emetic. The thick and viscous oil has many industrial applications, including softening or waterproofing materials and treating leather, and as an ingredient of cosmetic products such as soaps, ointments, crèmes, salves, lipsticks, hair care products and lotions. Sulphonated or hydrogenated Castor oil is known as Turkey Red oil and can be used as a dispersing agent and can be used in bath oils.
Fatty Acids
- Oleic- 3.0%
- Palmitic- 1.0%
- Linoleic- 4.2%
- Linolenic- 0.3%
- Ricinoleic- 89.5%

Coconut (Cocos nucifera)
Unrefined Coconut oil is solid at room temperature but melts at body temperature. It consists predominantly of saturated oils, which render it very stable and give it a long shelf-life. Although it is used for cooking, its profile is better suited for cosmetic uses. It can be incorporated into moisturizing body butter, hair care products, lip balm, and a soothing emollient in ointments or lotions. The terms ‘fractionated’ or ‘light coconut oil’ refers to a refined oil that lacks most nutrients of the cold-pressed oil. The main advantage of refined coconut oil is that it stays liquid at room temperature and does not smell of coconut.
Fatty Acids
- Caprylic- 5-9%
- Capric- 6-11%
- Lauric- 42-52%
- Linoleic- 14%
- Myristic- 13-20%
- Oleic- 3-12%
- Palmitic- 8-14%
- Stearic- 1-3%

Corn oil (Zea mays)
Corn oil is well known as a cheap and readily available cooking oil. Unfortunately, most corn is now produced from GMO sources. Regular corn oil tends to be highly refined and processed. Unrefined corn oil has a good nutritional profile that is rich in unsaturated fatty acids and vitamin E, but it is hard to find.
Fatty Acids
- Myristic – 0.1%
- Palmitic- 8-13%
- Palmitoleic- 1%
- Stearic- 1-4%
- Oleic- 24-32%
- Linoleic- 55-62%
- Alpha Linoleic- 2%
- Arachidic – 1%

Evening Primrose (Oenothera biennis)
The seeds of the otherworldly-looking Evening Primrose, which only opens its flowers at night, yield a most precious oil. Although edible, the oil is not used in cooking, but as a nutritional supplement. Evening Primrose Oil is rich in GLA, an essential fatty acid vital for maintaining numerous physiological processes. It boosts the immune system, reduces inflammatory symptoms including those of rheumatoid arthritis and Lupus, regulates menstrual and menopausal symptoms and reduces high blood pressure and cholesterol levels. It also helps with skin conditions such as acne, rosacea or eczema, and the healing of ulcers and nerve damage associated with diabetes. The oil can be used as a nutritional supplement or externally as a special ingredient of skin-care products. It soothes irritated or inflamed skin and can be used as an anti-wrinkle component of night crèmes in facial oils for mature skin.
Fatty Acids
- Linoleic- 73.3%
- Gamma-Linolenic- 9.0%
- Oleic- 8.3%
- Palmitic- 6.2%
- Stearic- 1.5%
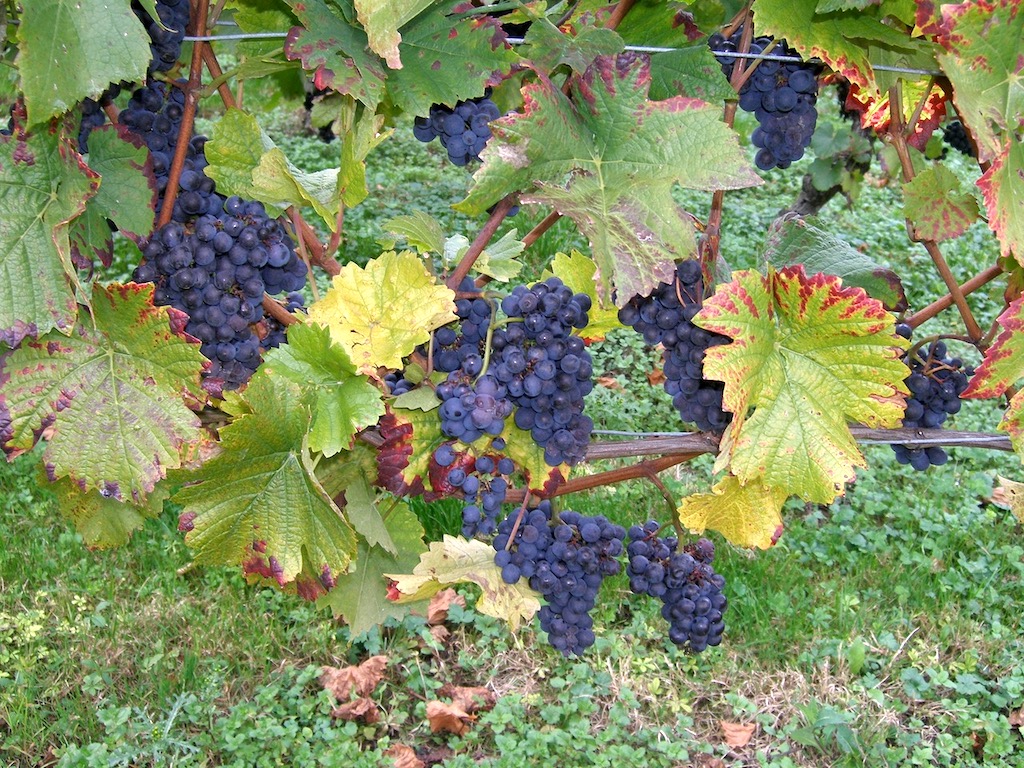
Grapeseed (Vitis vinifera)
Until fairly recently, grapes were more valued for their juicy fruit than their seed. But when examined more closely, the seeds yielded a finely textured, light oil with a good nutritional profile, including Linoleic acid, but not in the remarkable range compared to other oils. Its chief merit is its low cost, which makes it popular for inexpensive ‘natural’ cosmetics. Commercially, it is used in soap-making and as machine oil. Good quality Grapeseed oil is edible and can be used for cooking.
Fatty Acids
- Linoleic- 63.93%
- Linolenic- 0.77%
- Oleic- 23.65%
- Palmitic- 8.09%
- Stearic- 3.56%

Hazelnut oil (Corylus avellana)
Hazelnut oil has a fine nutty flavour and is nutritious and delicious. But not all commercially available hazelnut oil is of food-grade quality, and some are highly refined. Hazelnut oil is rich in vitamins A, B and E. Its light, dry or astringent texture lend itself to skincare products, particularly for oily skin types. It also has emollient properties that soften the skin. Commercially, it is used in a wide range of cosmetic products from hand crèmes to lipsticks, cleansing lotions and sun oils.
Fatty Acids
- Oleic- 77.4%
- Palmitic- 4.7%
- Linoleic- 13.9%
- Stearic- 2.6%
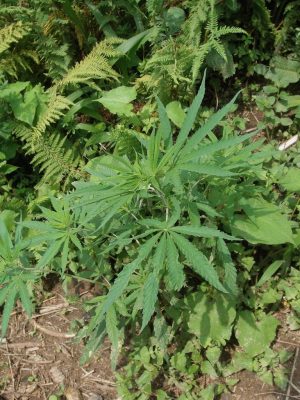
Hemp (Cannabis sativa)
Hemp Seed Oil is pressed from the seeds of Cannabis, but the oil does not contain any psychoactive properties. Overall, this oil has one of the best nutritional profiles of any plant oil and is extremely rich in omega-3 fatty acids that are so important to health. Hemp oil is edible and recommended as a nutritional supplement for many conditions, including menstrual problems, high blood pressure and other cardiovascular problems, MS, rheumatoid arthritis and even cancer. It also supports the metabolism, lowers cholesterol and soothes inflammatory skin conditions. Hemp oil has a thick, heavy texture, yet it feels soft and is readily absorbed by the skin. It is best used in combination with other oils in massage blends, lotions or crèmes.
Fatty Acids
- Alpha-Linolenic- 18.87%
- Gamma-Linolenic- 4.01%
- Oleic- 9.23%
- Linoleic- 56.03%
- Palmitic- 5.74%
- Stearic- 2.48%
Jojoba (Simmondsia chinensis)
Jojoba oil is produced from the seeds of a small desert shrub native to the southwestern United States. The rich, thick substance pressed from the seeds is more of a liquid wax that solidifies at just below normal room temperature. Jojoba oil is not used for cooking but has an excellent profile for cosmetic use. It is very nutritious and rich in vitamin E and certain proteins, including one that resembles collagen. Jojoba oil has excellent restructuring qualities that can repair chapped skin and may even be used on chilblains. It is also excellent for mature, dry and sagging skin to which it can restore some elasticity. The properties of Jojoba oil are similar and even superior to those of sperm whale oil, which it has come to replace in many natural beauty products. Native Americans have used Jojoba’s healing properties in cancer care and cosmetically for hair care preparations.
Fatty Acids
- Erucic- 16.3%
- Gadoleic- 69.3%
- Oleic- 10.1%
- Palmitic- 0-2%
- Behenic- 0-1%
Kukui Nut (Aleurites moluccana)
The Kukui tree is native to the Pacific region and is Hawaii’s official ‘state tree’. The light, yellow oil is highly moisturizing, yet non-greasy, making it an ideal ingredient for skincare preparations. Kukui oil can prevent the loss of moisture, keeping the skin smooth, supple and elastic. It is suitable for all skin types but particularly valuable for mature, chapped, and dry skin. As a component of healing ointments, it soothes irritable or inflammatory conditions, such as psoriasis and eczema, or burnt skin.
Fatty Acids
- Oleic- 20%
- Palmitic- 6%
- Stearic- 0.3%
- Palmitoleic- 0.1%
- Linoleic- 42%
- Linolenic- 29%

Flax/ Linseed (Linum usitatissimum)
Flax and Linseed are two names for the same plant, rich in both fibre and oil. The seeds have a remarkable composition of essential fatty acids and are an excellent source of omega-3 alpha-linolenic fatty acid. The human body can convert this fatty acid into EPA (eicosapentaenoic acid) and DHA (docosahexaenoic acid), the long-chain omega-3 fatty acids found in fish oil, but it is not very good at it. Some people even lack the necessary enzyme for this conversion. Nevertheless, Linseed oil is nutritionally very valuable and can be used in salad dressings or as a dietary supplement. For skincare products, it is less popular as it quickly turns rancid, has a strong smell and thick and sticky texture. Industrially, Linseed Oil is used as paint thinner and wood sealant, and artists use it for their oil paints.
Fatty Acids
- Lauric acid 0.02%
- Myristic acid 0.09%
- Palmitic acid 5.36%
- Stearic acid 2.26%
- Arachidic acid 1.06%
- Behenic acid 0.22%
- Lignoceric acid 0.58%
- Palmitoleic acid 0.04%
- Oleic acid 16.75%
- Gadoleic acid 12.53%
- Erucic acid 1.45%
- Linoleic acid 14.78%
- Alpha-linolenic acid 42.27%

Macademia (Macademia integrifolia)
The Macadamia tree is known as Bush nut in its native Queensland, Australia. It became popular after it was brought to Hawaii, which is now the world’s leading producer. Macadamia nut oil has an excellent fatty acid profile, comprising a good balance between monounsaturated, omega-6 and omega-3 fatty acids. This makes it very stable and a great choice for culinary use. Macadamia oil contains palmitoleic acid, a compound that is also found in human sebum. As the skin matures, the Palmitoleic acid diminishes. Thus, Macadamia oil provides excellent properties for skincare products for mature skin. It nourishes and tones the skin and helps to restore its elasticity. Macadamia oil is suitable for all areas, including very sensitive parts e.g. around the eyes, and is easily absorbed by the skin.
Fatty Acids
- Lauric- Traces
- Myristic- 0.4-1.6%
- Palmitic- 7-10%
- Stearic- 1.5-5%
- Oleic- 54-63%
- Palmitoleic- 16-23%
- Linoleic- 1-3%
- Arachidic- 1.5-3%
- Gadoleic- 1-3%

Neem (Azadirachta indica)
In Asia, Neem has the reputation of a miracle tree, and not just for its oil. Its other parts are also medicinally valuable. Neem oil has a very pungent, garlicky smell, which does not lend itself very well to massage or bath oils. But, it has potent anti-microbial properties that can be incorporated in salves and lotions to treat parasites (lice), fungal (Athlete’s foot) and bacterial infections. In Ayurvedic medicine, it is used for all kinds of skin problems.
Fatty Acids
- Palmitic- 18%
- Stearic- 15%
- Oleic- 50%
- Linoleic- 13%
- Arachidic- 2%

Olive (Olea europaea)
Olive oil hardly needs an introduction. It is one of the best cooking oils available. But unlike most vegetable oils, it is pressed from the seed but from the fruit pulp. The familiar rich greenish-yellow oil has a well-balanced heart-healthy fatty acid profile that is key to the Mediterranean diet. For most cosmetic products, olive oil is a bit too thick and heavy. Blended with other, lighter oils, it creates excellent slippage in massage blends. It can also be used as a menstruum to extract fatty components from plants such as St. John’s Wort. In Mediterranean countries, olive oil is used in soap-making and nourishing skincare products such as body butter and lotions. It soothes inflammatory skin conditions such as psoriasis, dermatitis, and eczema, and can be applied to burnt, dry or chapped skin.
Fatty Acids
- Oleic- 60-85%
- Palmitic- 14.4%
- Linoleic- 9-14%
- Linolenic- 1%
- Stearic- 2.43%

Palm (Elaeis guineensis)
Palm oil production has skyrocketed in recent years, much to the demise of virgin forests in tropical regions. Vast areas are turned over to oil palm plantations, with devastating consequences for the local ecosystems. Much of it is used as biofuel, a greenwashing coup. Energy giants are selling us palm oil as a source of sustainable energy without the need to change our behaviour while destroying ecosystems elsewhere.
Oil palms yield two distinct types of oil, one pressed from the fruit pulp, which is used in processed foods, and the other from the actual kernels. The latter is used predominantly for soap and detergent production. Palm oil is not a very healthy cooking oil as it contains a high percentage of saturated fats. It can be used in cosmetic blends, but the nutritional profile is not great.
Palm Fruit Fatty Acid Profile:
- Linoleic- 9-11%
- Linolenic- 0.4%
- Oleic- 39-41%
- Palmitic- 43-45%
- Stearic- 4-5%
Palm Kernel Fatty Acid Profile:
- Lauric- 40-55%
- Capric- 3-5%
- Caprylic- 2-6%
- Linolenic- 1%
- Myrisitic- 14-18%
- Oleic- 12-20%
- Palmatic- 6-10%

Peach (Prunus persica)
Peach is related to almond and apricot, and all three of these oils share similar qualities. Although peach kernel oil is slightly heavier, it is just as gentle. Due to its limited availability, it tends to be a pricey choice. Peach kernel oil may be used for cosmetic preparations such as facial lotions and rejuvenating crèmes for aged and tired skin, lip balms, bath or massage oils. It is rich in monounsaturated fatty acids. This oil is not for internal use.
Fatty Acids
- Palmitic acid 5-8%
- Oleic- 55-75%
- Linoleic- 15-35%

Peanut (Arachis hypogaea)
Peanut oil is cheap and widely available – and, unfortunately, often gene manipulated. They are an important cash crop and in terms of world production, peanuts take second place after soy. Peanut oil has a high smoke point, making it suitable for frying. It has a high percentage of monosaturated fatty acids, rendering it stable and giving it a long shelf-life. Peanut oil is rarely used for cosmetics, except as a ‘filler’ to stretch other, more precious oils. Allergies to peanuts are common. They are more likely to occur when exposed to crude, unrefined oil.
Fatty Acids
- Palmitic- 7.0 – 16.0%
- Stearic- 1.3 – 6.5%
- Oleic- 35.0 – 72.0%
- Linoleic 13.0 – 43.0%
- Linolenic Max. 0.6%
- Arachidic 0.5 – 3.0%
- Gadoleic 0.5 – 2.1%
- Behenic 1.0 – 5.0%
- Erucic Max. 0.5%
- Lignoceric- 0.5 – 3.0%

Pumpkin Seed (Curcubita pepo var. styriaca /syn. var. oleifera)
Pumpkins originated in the New World. They were completely novel to Europeans when Columbus introduced them. But, the familiar Pumpkinseed oil comes from a cultivated variety, Curcubita pepo var. styriaca (syn. var. oleifera) developed in Styria, Austria. The seeds of this particular variety are exceptionally rich in oil. Before pressing them, they are roasted briefly. The resulting oil is dark green and has a distinct nutty flavour. Pumpkin seed oil is very wholesome; rich in omega-3 and omega-6 fatty acids and vitamin E, A & C. Like pumpkin seeds, the oil is also rich in zinc. Traditionally, it was used as a nutritional supplement for conditions of the urinary tract, such as weak bladder or prostate problems. Pumpkin seed oil is rarely used in cosmetics, although its nutrients would add value. Keep in dark bottles in a cool, dark place. Exposure to heat and light deteriorates its quality.
Fatty Acids
- Oleic- 15.9 – 24.7%
- Linoleic- 56%
- Palmitic- 12.3%
- Stearic- 0.1 – 4.8%
- Linolenic 0.1%

Rapeseed/Canola (Brassica napus)
Rape, a member of the mustard family, is a widely produced commercial crop. The oil pressed from its seeds is sold under the product name ‘Canola oil’ and describes a type of rapeseed, which is low in erucic acid. Canola is a light cooking oil, with a better ratio of saturated and non-saturated fatty acids than other standard cooking oils. However, in Canada, which is the largest producer, most Rape is gene manipulated. In industry, Canola oil is used to manufacture margarine and soap, and as industrial machine oil. It is also one of the most important sources of biodiesel. Occasionally, it is found in cosmetic products.
Fatty Acids
- Myristic- 0.1%
- Palmitic- 3.5%
- Stearic-1.5%
- Arachidic- 0.6%
- Behenic- 0.3%
- Palmitoleic 0.2%
- Oleic- 61-70%
- Gadoleic- 1.4%
- Erucic- 0.2%
- Alpha Linolenic- 11%
- Linoleic- 21%

Rose hip Seed (Rosa rubiginosa)
Rose hip seed oil is a precious oil obtained from a Chilean variety of roses native to the Andes. Their seeds are very high in essential fatty acids (80%). Rose hip oil is not used for cooking but has an excellent profile for cosmetic uses. It is particularly suitable for facial blends and lotions that nourish the tender tissue around the eyes, and tone the skin. The oil has a light, gently astringent and moisturizing quality. It is valuable as an ingredient of ‘after sun care’ lotions, soothes burnt skin, and scars. Not for internal use.
Fatty Acids
- Oleic- 14.22%
- Palmitic- 3.71%
- Linoleic- 45%
- Linolenic- 33.08%

Safflower (Carthamus tinctorius)
Historically, Safflower is a dyers plant, valued for its pigment. But today, it is mostly cultivated for the oil content of its seeds. The yellow-orange, thistle-like flowers are also the source of what is known as ‘false saffron’, a cheap substitute, which does not come close to the real thing. Safflower oil is a nutritious cooking oil with a relatively neutral flavour. There are two varieties of Safflower: one is higher in monounsaturated (oleic acid), the other in polyunsaturated fatty acids (linoleic acid). The monounsaturated variety is more stable and has a longer shelf-life.
Fatty Acids
- Oleic- 75.33- 80.00%
- Palmitic- 4-9%
- Linoleic- 12-16%
- Linolenic- 1%
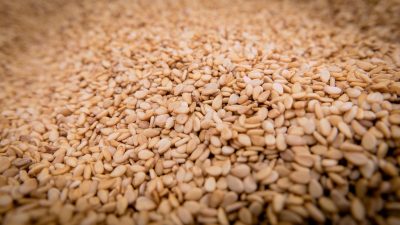
Sesame (Sesamum indicum)
Sesame oil originated in Asia and the Middle East, where it has long been used as valuable lamp oil. It was also popular for making salves and skincare products. Sesame oil is rich in calcium, oleic and linoleic acid and has a long shelf-life. It has a distinct nutty flavour and is very good as cooking oil The light texture and good moisturizing properties make it suitable for skincare products, cosmetics, soaps and detergents. Two types are available commercially: light and dark sesame oil. They don’t derive from different plants, but the seeds used for dark Sesame oil are toasted before pressing, making the flavour more intense. Dark Sesame oil is only used for cooking.
Fatty Acids
- Linoleic- 43.93%
- Oleic- 39.93%
- Palmitic- 8.99%
- Stearic- 3.50%
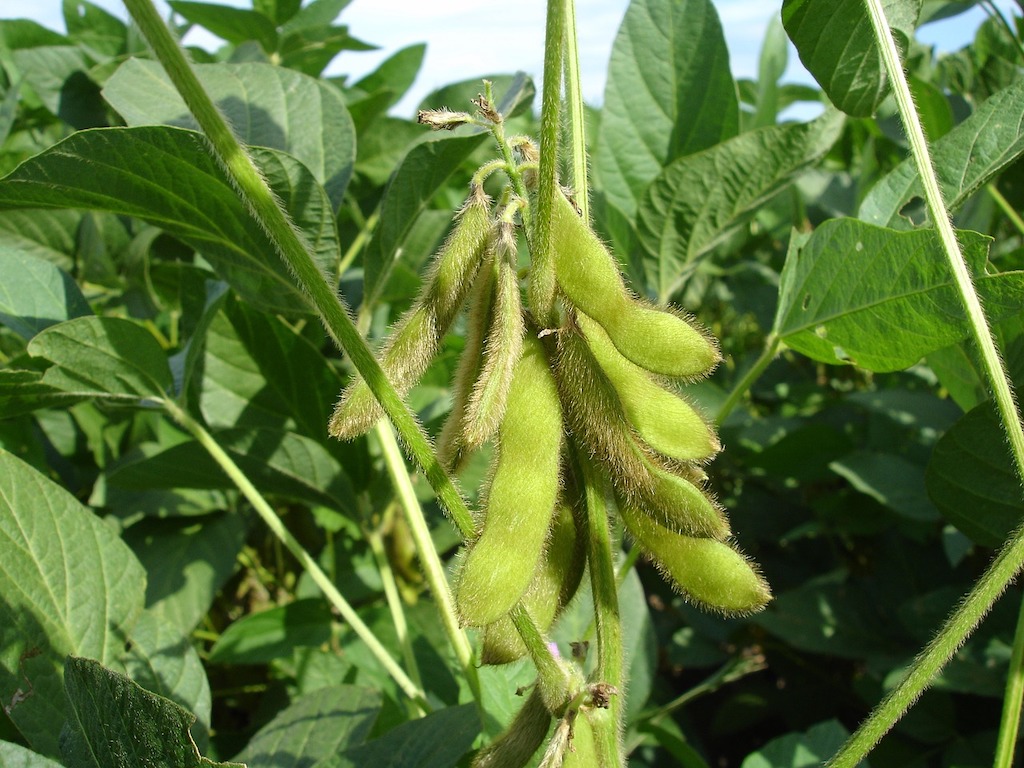
Soy oil (Soja hispida)
In Asia, soy is a staple crop. Its remarkable rise to stardom started about 50 years ago. Before then, it was virtually unknown in the western world. It has become a common ingredient in almost all processed foods. In terms of market share, Soybean oil ranked as the number one vegetable oil until recently, when Palm oil overtook it. Unfortunately, soy is also the most ubiquitous GM crop. Soybean oil is not only used in the kitchen but also has many industrial applications. It is an ingredient of soaps, detergents and natural cosmetics and is used to manufacture linoleum, plastics and vegetable-based inks. Its chief advantage is that it is cheap, freely available, and has a long shelf-life.
Fatty Acids
- Myristic- 0.1%
- Palmitic- 10.8%
- Stearic- 4.0%
- Palmitoleic- 0.2%
- Oleic- 23.8%
- Gadoleic 0.2%
- Linoleic 53.3%
- Linolenic- 7.1%

Sunflower (Helianthus annuus)
Native Americans regard the sunny sunflower as sacred. But that has not stopped its rise to worldwide cultivation. The seeds yield a fine and nutritionally balanced cooking oil that is second only to olive oil. Different varieties of Sunflowers have slightly different profiles. Thus, the regular cooking oil is not necessarily the same as what is sold for cosmetic use. Sunflower oil is relatively light with a medium viscosity. It has an affinity with human sebum, which is why it makes a good, affordable base oil for skincare preparations, massage and bath oils. It can also be used for macerating herbs (e.g. to produce calendula or St. John’s wort oil). The specific fatty acid profile varies considerably depending on the variety.
Fatty Acids
- Linoleic- 62-70%
- Oleic- 15-25%
- Palmitic- 5-8%
- Stearic- 4-6%
- Palmitoleic- 0.1-04
- Linolenic- 0.2- 1.4%
- Arachidic 0.0-0.3%
- Gadoleic 0.2-1.0%
- Behenic 0.5-1.1%
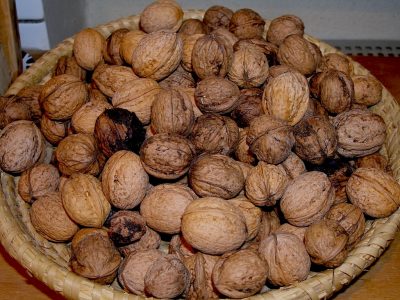
Walnut (Juglans regia)
Walnuts are popular as an ingredient of baked goods or trail mixes. But only gourmets are familiar with the delicious, nutty oil pressed from them. Since it is rich in unsaturated fats, it is mostly used in salads or as a flavouring oil in fine baking. It is rarely used in skincare preparations as the unsaturated fats spoil quickly, turning the product rancid. But its soothing, rejuvenating, and emollient properties can make it a rare treat for dry and tired skin.
Fatty Acids
- Myristic- 0.1%
- Palmitic- 6-8%
- Palmitoleic 0.2%
- Stearic 1.3%
- Oleic 14-21%
- Linoleic- 54-65%
- Linolenic 9-15%

Wheatgerm (Triticum sativum)
Wheat germ oil is obtained from the germ part of the wheat kernels. It is very nutritious and especially rich in vitamin E, a powerful antioxidant. Wheat germ oil is not commonly used for cooking but may be added to salad dressings to enhance the nutritional profile. However, its flavour is not exactly delicate. Purified vitamin E oil, that does not contain unsaturated fatty acids, is preferred for cosmetic preparations. Vitamin E oil stabilizes blends and prolongs their shelf-life. Its nutritive properties can help prevent stretch marks and scar tissue formation.
Fatty Acids
- Palmitic- 14-18%
- Stearic- 0.5-0.6%
- Oleic- 16-22%
- Linoleic-54-58%
- Linolenic 4-7%
#Ads
Disclosure: As an Amazon Associate, I earn from qualifying purchases on Amazon and other affiliate sites.


 Foods are also categorized into three basic types:


 Image by