Gardening Jobs in June

Gardening Jobs in June

There are plenty of gardening jobs to do in June!

If you thought that now the growing season is in full swing you can kick back and relax, you are mistaken. June is a rather busy month in the garden, especially if you want to continue harvesting veggies in the fall and winter.


But first things first:

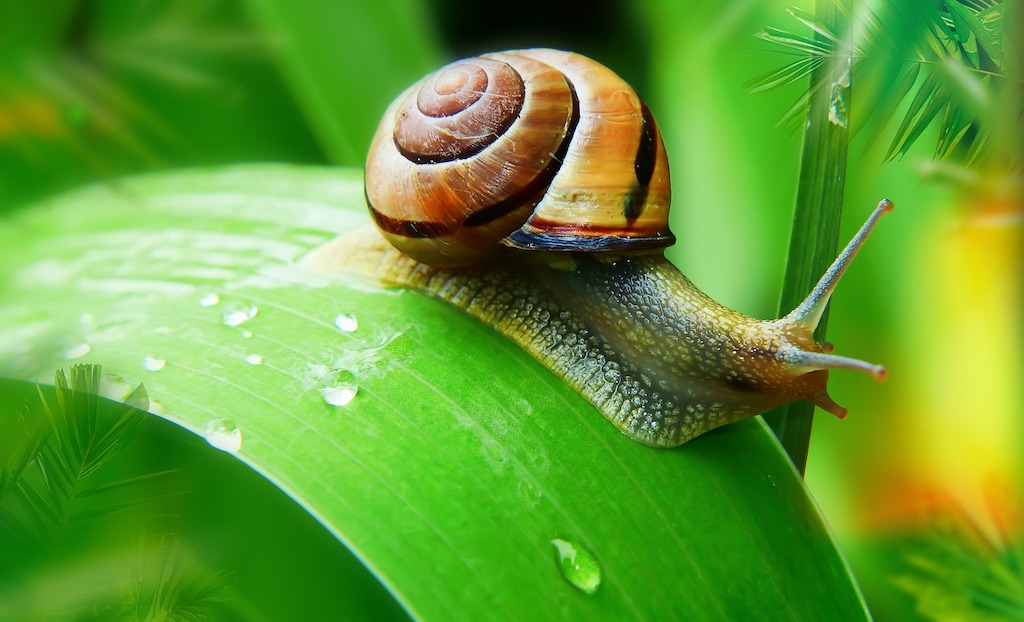
Slugs and snails are very hungry at this time of the year. You will have to beat them to it if you want some of those veggies for yourself. Regular slug hunts at dusk and dawn are the most effective way to keep them at bay.

To keep the soil cool and prevent it from drying out, mulch all around your plants, especially around thirsty ones such as tomatoes and zucchinis. Mulching also helps to control the slugs.

Water regularly, but not excessively.

By now, your tomatoes should be in the ground. Gently tie them to their support and pinch out the side shoots.

On hot days, make sure you don’t forget to ventilate the tunnel or greenhouse.

Harvest herbs, such as savoury, oregano and lemon balm before they begin to flower.


Sowing:

Hurray, it is finally warm enough to sow Basil and Coriander!

You are probably already harvesting lettuce, rocket and radishes, and maybe even snow peas. For successive crops, continue sowing them until the end of July.

You can sow beans now, but protect them well against slugs – they love the young shoots!

If your season is long enough and the climate reasonably mild, you still have a chance to sow courgettes and pumpkins -but hurry up, it is getting late! Young plants can be planted into their permanent position now.

Autumn/winter veggies like autumn leeks and brassicas like kales and cabbage can be sown until the middle of June.

The middle of June is the end of rhubarb and asparagus harvesting time.


Wildlife

Don’t forget the animals at this time of the year – they really appreciate a source of clean cool water and some seeds or fruit.

Check out SeedsNow for your organic gardening supplies.


Happy Gardening!


Image by Krzysztof Niewolny from Pixabay

#Ads

Disclosure: As an Amazon Associate, I earn from qualifying purchases on Amazon and other affiliate sites.

Permaculture – Paradigm Shift for a Sustainable Way of Life

Permaculture – Paradigm Shift for a Sustainable Way of Life

It is easy to get down on the way things are going in the world – climate change is no longer a fringe topic, yet any plans to address it fall far short of what would be needed to halt it. Growing levels of pollution, consumer goods designed for the landfill, destruction of habitats and ecosystems all contribute to our demise.

It is easy to give up and resign oneself to the ‘that’s just the way it is,’ mentality while burying one’s head deeply in the sand. One person alone can’t do much anyway, so why bother worrying about anything, right?

Wrong! It doesn’t have to be that way. And right now, as we are beginning to see the light again at the end of the tunnel, we have a unique chance to do things differently. One thing many of us have learnt to appreciate over the past year or so is the importance of nature when all the entrapments of our postmodern lifestyles begin to crumble.

Paradigm shift

Things are changing, quietly and persistently. People are looking for a quieter, more sustainable way of life and the idea is spreading, sprouting at the grass-roots level, from one community to the next.

It has been said that the next revolution will be fought in our gardens, and I am beginning to see it that way, too. It will be fought with peas and love – a non-violent, lifestyle revolution called ‘Permaculture’, a growing movement, not just across the country, but across the entire globe.

You may have heard of it. Sometimes referred to as the ‘no-dig system of gardening’, many conventional growers, and even organic growers, dismiss it as a naive and impractical way to feed the multitudes around the world. And, perhaps that would be true if the aim was to swap industrial farms for permaculture farms while continuing with ‘business as usual’ with our economic system.

But that is an illusion. Industrial farming is on the brink of collapse – its ‘paradigm’ based on ‘war against nature’ and ‘war against insects’, its soils are depleted and ecosystems have been degraded, just to maximize short-term profits. To that end, GMO seeds are engineered to withstand being doused with toxic chemicals. The result is predictable: resistant ‘competitors’ – so-called superweeds and insects from hell. Has the message got through yet, that we cannot win this war? And that continuing to fight it will mean our certain demise?

paradigm shift

Image by Tumisu from Pixabay

The paradigms of Permaculture, on the other hand, are based on abundance, cooperation, and sharing. Permaculture seeks to restore rather than exploit ecosystems. ‘Thinking globally and acting locally’ – If yields are higher than what is needed, they can be sold on a wider national or international market. But, let’s produce local food for local people.

Presently the marketplace is based on cash crop economics, exploiting disenfranchised communities. Their land is ‘grabbed’ by multinationals and turned into monocultures – like palm oil, coffee, or bananas. Peasants have no land nor time to grow enough food to feed themselves. Instead, they barely survive on the pennies they earn for their labour in this ‘feudal’ system that has its roots in colonial times.

We can’t change the whole world at once, but we can start in our own backyards. We can create cooperative permaculture farms sharing harvests with neighbours and friends, thus reducing reliance on industrial agriculture that brings us products from around the world at an enormous human and environmental cost.

How is Permaculture different from Organic Farms?

Permaculture design is fundamentally different from all types of conventional agriculture – even organic farms. Permaculture seeks to imitate and cooperate with nature. One of the ‘fathers’ of Permaculture, Bill Mollison, grouped its philosophy into three ethical paradigms and 12 principles.

The ethical paradigms speak for themselves:

  • care for the earth,
  • care for people and
  • fair share

The 12 principles of permaculture require a bit more of an explanation:

1. Observe and Interact:

Permaculture aims to work with nature. The gardener observes and tries to understand the processes that are at work in a given habitat, then interacts with these to support some features and maybe discourage or relay others.

2. Catch and Store Energy

Resource management is a crucial aspect of the system – water and compost are crucial resources. By recycling greywater and building catchment areas for rainwater, it can be harvested and retained instead of losing it to run-off.

Likewise, biomass is returned to the soil in the form of compost and mulch. The continuous process of nurturing the soil restores its vitality. Instead of becoming depleted it is invigorated and restored.

3. Obtain a Yield

Permaculture is not intended as an act of ‘self-sacrifice’. We all need to live and our ‘input’ must produce some kind of worthwhile ‘output’. Ideally, our gardens would provide for all our needs, but it is limiting to think of ‘yield’ only in terms of consumable ‘products’. Aesthetics or relaxation can also be a ‘yield’.

4. Apply Self-Regulation and Accept Feedback

In a world of limited resources, we need to strive for balance and ensure that not only our present needs are met, but that the needs of generations yet to come can also be met. And that the ecosystem as a whole (with all its interactions) must be taken into consideration. Permaculture aims to produce abundance for all the species that share a particular space. The effects of our actions take a while to manifest. We should always observe and respond to the ‘feedback’ we are getting and be prepared to change our ways if the effects turn out to be damaging to any part of the system as a whole.

5. Use and Value: Renewable Resources and Services

Nature supplies us with everything we need. Make use of all the resources that are already available, share and trade, upcycle or repurpose things that are already at your disposal instead of buying new stuff.

6. Produce No Waste

As an extension to the 5th principle, consider the impact of everything you buy or produce. Kitchen scraps can be composted – but what about all the plastic? If it can’t be recycled, reused, repaired or repurposed it is ultimately designed for the waste dump and will continue to be a burden on the planet for a long time to come. Aim for zero waste.

7. Design: From Patterns to Details

Before starting to work on a plot, consider the seasons and weather pattern, geological patterns and features. Clever design can save you work. Utilize whatever is available to maximum effect. Focus first on the overall patterns, then fill in the details.

8. Integrate Rather Than Segregate

Nature does not create monocultures – they leave crops vulnerable to pests and diseases. Instead, nature creates eco-systems that thrive in unison. The pests of one plant are the ‘helpers’ of another or food for the birds. The balance is kept in check and neither becomes dominant if the garden is geared towards producing abundance and diversity.

In Permaculture, garden plots are not planted with single varieties, as plant communities composed of various species that can thrive together within the garden ecosystem.

9. Use Small and Slow Solutions

We frequently think that we need ‘big’ solutions to deal with big problems. But often the opposite is true – especially when it comes to gardening. The earth is made up of millions of micro-environments that call for special adaptations rather than a one-size-fits-all solution. Working at a smaller scale also means it is more manageable.

10. Use and Value Diversity

Diversity is a key concept of permaculture. Natural conditions are constantly changing and organisms respond by adaptation. Different species have evolved to thrive in different conditions. We never know what sort of weather we may have during the growing season – and given the effects of climate change, weather extremes have become the norm, rather than the exception. The best way to safeguard food security is to plan for these extremes by planting different varieties of the same species to spread the risk. Depending on actual weather conditions that year, certain varieties will thrive while others won’t. Food security depends on diversity – not on just a few, patented seeds that have been manipulated to resist the chemical weapons of industrial agriculture.

11. Use Edges and Value the Marginal

The margins are the most interesting areas of the garden. This is where different elements can interact and adapt. In nature, marginal environments are often the most diverse. Socially, too, the ‘fringe’ is where new ideas are born.

12. Creatively Use and Respond to Change

Change is the only constant. By anticipating change rather than resisting it, we can use it as an opportunity and adapt to the challenge.

The 12 principles of permaculture apply to small or large scale horticultural projects and even to large scale ecosystem restoration. But permaculture is not only about food. It is ultimately about ecology, which includes human ecology – human/nature interactions. It is about restoring the integrity of the web of life, of which we are but one strand among many.

Resources:

#Ads

Disclosure: As an Amazon Associate, I earn from qualifying purchases on Amazon and other affiliate sites.
Banner image by John Hain from Pixabay

Plantains – Plantago sp.

Plantains – Plantago sp.

Introduction

Most of us are familiar with the broad-leaved plantain, a common weed that seems to grow just about anywhere. Or, perhaps you also know the Ribwort Plantain, with its long, slender leaves. But did you know that this genus of humble weeds comprises some 200 species that occur all over the world? 


As masters of adaptation, Plantains are ubiquitous. They have managed to eke out a living in almost every conceivable kind of habitat. Gardeners curse them as intruders when they cannot abolish them from their neat lawns and paths. But they are oblivious to this humble plant’s remarkable healing properties!


Name

Linnaeus named the genus, ‘Plantago’ which derives from the Latin word ‘plantar’ meaning ‘foot’. He intended to convey that these plants go wherever they want – or rather, wherever we go and spread their seeds, via the bottoms of our boots. This property was not lost on the Native Americans either. They called it ‘white man’s footprint’ as they watched it spread across their land.


History

In neolithic times, the broad-leaved Plantain (Plantago major) was held sacred for it grew nowhere better than on the old straight track, the ceremonial causeway. They were always kept clean and free of weeds, but the plantain proved unconquerable. Hence it was called ‘Wegerich’ or, ‘King of the road’.

The Anglo-Saxons included it in their ‘Nine Herbs Charm’, calling it ‘Waybread’. This name refers to its use as a sacrament. Sacrificial victims were given a gruel of Plantain seeds as a kind of ‘Last Supper’.


Its amazing resilience and determination to return eternally, no matter how often it was cut or removed, were a sure sign of its supernatural powers. Thus, Plantain roots were used as a talisman to protect the traveller and its leaves put into shoes was supposed to keep the feet happy and untiring.

Ribwort Plantain
Image credit: Kathy Büscher from Pixabay

Medicinal use


Constituents: mucilage, glycoside (Aucubin – an antimicrobial and liver protective agent), ursolic acid, tannins, silicon, vitamin C, K, citric acid, potassium, and zinc


Action: bitter, astringent, anti-hepatotoxic, laxative (bulking agent), antispasmodic, antibiotic, expectorant, cooling, soothing drying


Plantain has an amazing range of healing properties. The leaf contains an antibacterial glycoside that is effective against many types of bacteria. 

External use

The fresh leaves make a very effective and readily available anti-bacterial band-aid that can be used on all kinds of scrapes, small wounds and insect or even spider bites. Just take a leaf, rub it between your fingers so that the juice comes out and apply it directly to the sting or wound. The roots are said to be similarly effective on scorpion stings and snake bites.

A paste made from the boiled seeds of broad-leaved plantain draws out splinters and thorns.


An infusion of the leaves combined with oak bark makes a good mouth-wash for gingivitis or stomatitis or for cleansing wounds (even festering ones. )or to treat varicose veins, haemorrhoids, ulcers. The leaves contain silicon which strengthens and tightens connective tissues.


Internal use:

For internal use, it makes an excellent tea or syrup for treating diseases of the respiratory system. The leaves of the Ribwort plantain are particularly effective as they are anti-inflammatory and expectorant. The antibiotic properties of the fresh juice can even be used for the treatment of tuberculosis. But upon drying the antibiotic effect diminishes.


The fresh juice also makes a good blood cleansing remedy and can also be used as an anti-inflammatory agent for treating swollen glands.


Plantain can support other organ systems as well. Its antimicrobial properties can improve intestinal health (fresh juice) and its anti-hepatotoxic effect protects the liver better than milk-thistle seeds. 


An infusion of the leaves helps to control diarrhoea, while the seeds are a great aid for the elimination of waste products and for weigh-loss. As they are water-soluble (especially those of Plantago psyllium), they bulk up the stomach content and absorb and eliminate toxins. This also makes them useful as a safe and effective remedy for constipation. But drink PLENTY of water to facilitate excretion.


Recent research has shown the seeds of the broad-leaved plantain to have potent anti-cancer properties.


Foraging

Plantains are edible. The young leaves can be added to salads or used as a potherb when combined with other herbs. (Older leaves tend to be rather tough and stringy.) The leaves make a great addition to green smoothies, while the roasted seeds can be mixed into the porridge or muesli, and the birds love them too!

Dyeing Easter Eggs – Naturally

Dyeing Easter Eggs – Naturally

How to dye Easter Eggs the natural way

It’s Easter (already!) Every year, I see Easter Eggs dyed in garish colours for sale at the shops. I shudder to think – what is in these dyes? This year, I decided to dye some eggs with natural colours, just for the fun of it.

This is a lovely project to do with kids, but if you want to produce several different colours it is quite a bit of work – not hard work, but time-consuming.


What you need

All you need are some eggs and some raw materials to make your dye baths. Use an old pot as some of the materials may stain permanently. Hard boil your eggs in advance. White eggs take on the colour better than brown ones.

  • White eggs, hard-boiled
  • Vinegar
  • An old pot
  • Dye materials:
    Yellow – 20g of dry Turmeric powder, or Yellow Onion Skins
    Orange – 1 cup of grated carrots
    Red – 1 cup of grated fresh beetroots
    Green – Fresh Nettles, or Spinach leaves. Chop finely and use at least 2 cups.
    Blue – 1 cup of grated red cabbage

Dye bath for Easter Eggs


Method:

Making the Dye Baths

The procedure is always the same. Take about 1 cup of dye material and 3 cups of water. Simmer for about 15-20minutes, then turn off the heat strain and cool. Add a couple of tablespoons of vinegar, then place your hard-boiled eggs into the dye bath and keep them submerged for about 24 hours.

After 24 hours remove the eggs. You can wash them if you want a cleaner, pastel colour or dry the eggs completely. For a final touch, polish them with a dab of oil to bring out the colour.

Note: Don’t leave the eggs in the dye bath for too long. I tried leaving them in there for two days, thinking that it might make the colour stronger. Maybe it did, a bit. But the eggshells turned soft.

Natural Dyes – The Colours of Nature

Natural Dyes – The Colours of Nature

The art of natural dyeing comprises a huge body of knowledge. Sadly, it has been fading ever since the discovery of tar-based pigments at the beginning of the 19th-Century. Natural dyeing methods and the intricate arts of natural textile design are fast becoming another relic of times gone by.

Unlike birds with their flamboyant feathery attire, human beings are not born with a naturally colourful outfit. The birthday suit varies in tone, but no matter what, it is pretty plain. We have to draw on our own ingenuity and creativity when it comes to designing our apparel.

A true game-changer in our human quest to stand out has been the discovery of how to use the colours of nature to our own advantage. The search for natural dyes is as ancient as it is universal. No matter which culture we examine, all have experimented and explored every conceivable source of pigments in their environment. Everything from shellfish to lichen, not to mention roots, barks, leaves, berries, fungi, and even flower stamens have been explored for their potential as a dye.

Body-paint

Even societies that traditionally pay little attention to clothing still use pigments to paint their bodies. Such body paints are typically obtained from ochre, chalk, and charcoal and usually used on special occasions such as rituals, healing ceremonies, or initiations.

A slightly more elaborate (and more permanent) type of body ornamentation is seen in the art of tattooing. But permanence is not necessarily always desirable. Being able to change design from time to time would certainly be nice. Certain vegetable dyes are used in this way. They last for a few days, at least, but not forever. before long they will wash off, thus leaving the ‘canvas’ clean for new designs. The best-known vegetable dye for temporary designs is Henna (Lawsonia inermis). Body painting with Henna is still widely practised in the Middle East and in Asia. It is an integral part of traditional wedding preparations.

In the West, Henna is mostly used as a popular hair dye, and nowadays also for temporary tattoos. In South America, indigenous people use Achiote (Bixa orellana), and Huito (Genipa americana), as body paint or dye.

Henna tattoo

Colour as code

But colours express more than just artful fancy. Practically all cultures associate certain colours with specific meanings. Colour is an essential key to the mysteries, which can unlock the significance of a whole complex of symbols. For example, the four directions are universally colour-coded, although different from one culture to the next. The colour encodes a whole network of associations – e.g. the East is the direction of the rising sun, of new beginnings, of birth etc. and its colour is often yellow, or white. The relevance to the topic of dyes is that the plants and materials which yield dyes have also become part of the symbol complex.

‘Show your true colours’

We still use colour in this way today, although usually in a secular context and more often than not, we are not even aware of it. We paint political parties red or blue, speak of ‘the grey (indistinguishable) masses’, or label things ‘green’, if they are eco-friendly. Different social groups still follow an unspoken dress-code – business people prefer greys, whites, beige, or dark blue, while Goths wear black. In the West, white is associated with purity, while in India, it is the colour of the dead and of ghosts.

Likewise, traditional costumes also convey much more than meets the uninitiated eye. Every piece of clothing signals a specific message informing those in the know as to the social and marital status of the wearer. This message was woven as pictographic symbols right into the fabric, or colour-coded into the design. Other items of clothing, worn only at certain times, e.g. during a hunting expedition, or for certain rituals, were covered in colour-coded protective symbols to act as spells.

Colour as a status symbol

Some natural colours are exceedingly precious due to the rarity of the substance that yields them. Royal purple is derived from molluscs, and not easy to come by. For a long time, it was a prerogative reserved for royalty to wear this colour.

Nor could an ordinary mortal afford it, given the extraordinary price tag. In Roman times (400AD) a pound of cloth dyed in royal purple costs the equivalent of $20.000! The mollusc was already endangered and very rare. And, as is often the case, the symbolic value drove up demand which in turn catapulted the price into an intergalactic orbit. As a result, the status association was reinforced.

Other colours, such as those obtained from walnut shells, or onion skins, or lichen were more easily available and widely used – despite the time-consuming process. Large amounts of plant materials had to be gathered; the linens and skeins of wool had to be prepared with a mordant to render them more absorbent and a fixative added in to fix the colour so it does not fade too quickly in subsequent washes.

The art of natural dyeing comprises a huge body of knowledge. Sadly, it has been fading ever since the discovery of tar-based pigments at the beginning of the 19th-Century. Natural dyeing methods and the intricate arts of natural textile design are fast becoming another relic of times gone by.

How to dye wool with natural materials

How to dye wool, using natural materials

Preparing the wool:

In order to prepare the yarn, it has to be gathered up into skeins and tied loosely but securely with a piece of yarn of the same material. The first step is to thoroughly wash the skeins. If you want to experiment at home, use natural wool as this is the easiest material to prepare.

All the natural oils in the wool have to be removed, so use a mild flaked natural soap, so that it will dissolve easily in hot water. Rinse the wool with several rinses of hot water to wash out all the soap.

Mordants

The washed yarn is now ready for the mordant bath. Depending on the mordant different shades of colour can be achieved using the same plant material. Commonly used mordants are alum, copper sulphate, iron sulphate, tin or chrome, which are toxic! (Keep out of reach of children!)

Due to this toxicity, some people prefer to do without. But without the mordant or the fixative the dyes are not colour-fast. They will run very easily in the next wash.

To produce a stronger colour one can ‘over-dye’ the skeins, i.e. submit them to several treatments in the dye bath. Only do this with yarn, not with finished pieces of textiles, or knitted jumpers since they will shrink in the hot dye bath.

The most commonly used mordant is Alum, which is another way of saying ‘potassium aluminium sulphate’. Sometimes the wool is subjected to several different mordants to achieve a different shade of colour.

Equipment

Dyeing does not require a whole lot of equipment, but as the mordants are toxic, it should always be done outside.

Tools:

  • large pot
  • stick, or large spoon.
  • Gloves

Set them aside as dedicated utensils for this purpose only.

Never use them for cooking after you have used them for dyeing.

Ingredients:

  • 4 oz aluminium sulphate
  • 1 oz cream of tartar
  • 1 lb wool
  • Water

Method:

To mordant the wool follow this procedure:

Place the aluminium sulphate and the cream of tartar in large pot of cold water. Stir well to dissolve the powders. Once the powders are fully dissolved place the wool into pot and slowly bring the mordant bath to a boil. Turn down the heat and simmer gently for 1 hour. If the wool is very fine and soft, less mordant and a shorter boiling time is sufficient.

After 1 hour, take the pot off the heat, drain and gently squeeze out the liquid. (Wear gloves!) The wool can be dyed right away, or it may be dried and stored for later use.

For the dye bath, it is usually best to use fresh plant materials, but make sure you either pick them from your own garden, or from a place where the plants are in plentiful supply.

Use about 1 lb of plant material per 1 lb of wool skeins.

Place the plant materials into a muslin bag and tie securely.

Place the dye pot on the stove, ¾ full of water.

Add the muslin bag of dye material and submerge it well.

Place the skeins of wool into the pot and slowly bring to the boil, then turn down the heat and allow to simmer for about one hour.

Stir occasionally.

After an hour, turn off the heat, but leave the skeins in the water until it is cold, or when you deem the colour to be just right. Lift out the skeins (a pair of metal tongues will help), and rinse in water of the same temperature.

When the water runs clear, you can hang the skeins up to dry. (A suspended rod will do fine)

Fix a light weight to the bottom of each skein to prevent crinkling.

CAUTION: Mordants are mineral based substances that are highly toxic. Such substances must be handled with due care. Wastes must be discarded properly. Wear protective clothing (especially gloves) and avoid inhaling the fumes. Dyeing should preferably take place outside.

The information given here is for educational purposes only.

#Ads

Disclosure: As an Amazon Associate, I earn from qualifying purchases on Amazon and other affiliate sites.
Some common dye plants:

Plant

Part

Colour

Mordant

Madder (Rubia tinctorum)

roots

deep red

alum

Woad (Isatis tinctoria)

leaves

blue,

Somewhat complicated process involving a real chemical cocktail. Woad (Indigo) dyes by oxidation, the trick is to get the dye bath right. Indigo is a fast dye that fades very little in sunlight or in washing.

Weld (Reseda luteola)

whole plant

lemon yellow,

alum

Blueberries (Vaccinium myrtillus)

berries

shades of blue and purple,

alum

Elder (Sambucus nigra)

berries,
leaves

purple and violets
green

alum

Blackberries (Rubus fructicosus)

shoots
berries

black/grey
blue//grey

iron
alum

Bracken (Pteris aquiline)

young shoots
roots

yellow/greens
orange/yellow

alum

Heather (Calluna vulgaris)

shoots

olive/yellow

alum

Fig (Ficus carica)

leaves

lemon yellow

alum

Birch (Betula alba)

leaves

yellow

alum

Privet (Ligustrum ovalifolium)

leaves

yellow

alum

Ragwort (Senecio jacobaea)

whole plant

yellow

alum

Tansy (Tanacetum vulgare)

flowers

yellow

alum

Canadian Golden Rod (Solidago Canadensis)

flowers

golden yellow

chrome

Pine (Pinus sp.)

cones

orange/yellow
browns

alum
iron

Onion (Allium cepa)

skins

golden brown

alum

Walnut (Juglans regia)

shells

pinkish browns

no mordant

Turmeric (Curcuma longa)

rhizome

yellow

no mordant

Pin It on Pinterest